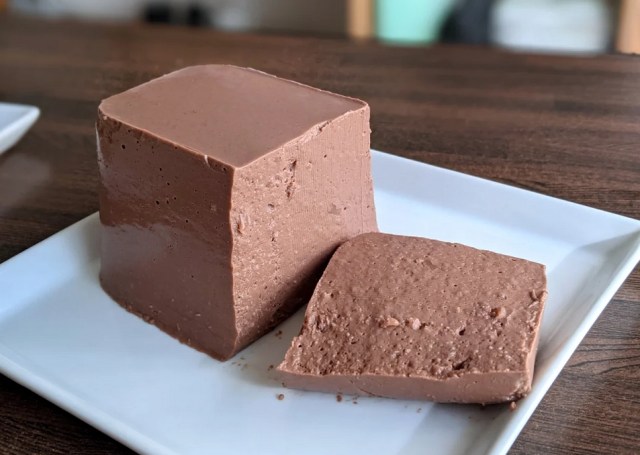
Just mix the ingredients, chill, and enjoy!
It turns out that it’s pretty easy to make your own cheesecake so long as you have some yogurt, some cream cheese, and some gelatin to help it all set. Our resident reporter and culinary innovator Mr. Sato was so inspired by this discovery that he thought up a brand-spanking-new recipe of his own, with one key difference: chocolate.
Kaldi Coffee Farm’s Dark Chocolate Spread, to be exact. Mr. Sato has been shopping at the international ingredients chain quite often as of late, so it’s no wonder this little pot of chocolatey goodness leaped out to him. Though he used Kaldi’s Dark Chocolate Spread, he recommends Gianduja Spread, Mature Chocolate Spread, and Nutella, depending on your own taste preferences.
▼ The one Mr. Sato used costs 740 yen (US$6.61) for a 360-gram (12.69-ounce) pot.
Are you ready to learn how to make super easy chocolate mousse?! Who am I kidding? Of course you are!
Ingredients:
-
- Yogurt (350 grams/1.5 cups)
- Dark chocolate spread (90 grams/6 tablespoons)
- Powdered gelatin (8 to 10 grams/1.8 to 2 tablespoons)
- Sugar (to taste)
▼ The main stars of this recipe, all lined up.
First, weigh out your yogurt and pour it into a mixing bowl. Keep the yogurt container—it can be used to shape and cool the mousse in the final stages, so clean it out and leave it to dry. Then add your chocolate spread.
▼ Yum, appetizing.
Mix the two ingredients together with a whisk until it’s smooth.
Next, prepare the gelatin by dissolving it in a small bowl of hot water.
Use a separate bowl to gradually combine a small amount of the yogurt mixture and the gelatin, bit by bit. Adding it all at once will make the mixture lumpy and clumpy, and no one likes those adjectives applied to their chocolate mousse.
Once the gelatin is more of a paste, combine it completely with the mixture in the main bowl and mix it until it has an even consistency. Put the mixture through a strainer to remove any lumps of gelatin and make sure you have a smooth, delicious mousse left at the end.
After one more mix for good luck, pour the contents into the yogurt container.
▼ Give the container a good tap to make sure it all settles at the bottom!
Then pop it in the refrigerator and leave it for two to three hours to set.
…
Okay, skipping forward two hours:
Tip the container over onto a plate to get it out. If the mousse won’t budge, try poking a hole in the base of the container, or cutting out the base to free it.
Hold your breath, everyone…
Yes…
Yes!
▼ Magnifique!
This one specifically was made with 10 grams of gelatin and it came out very handsomely. There are a few bubbles here and there dotting the surface, but it has a robust form and sits on the plate without collapsing into goop.
With it sat on the plate, feel free to subject it to the ultimate test—wiggling it back and forth a bit with your hand.
▼ *wigglewigglewiggle*
Meanwhile, the 8-gram gelatin version is a bit…meltier. This doesn’t change how delicious it looks, but it’s less firm than the 10-gram version.
Time to test this one out too.
▼ *wurblewurblewurble*
The 10-gram version is certainly prettier. Take a look at them side-by-side!
When sliced, it retains its shape beautifully.
The 8-gram version is a bit sloppier.
But funnily enough, Mr. Sato much preferred the 8-gram version! It was soft and velvety and would pair perfectly with some whipped cream.
Everyone has their own favorite consistency, though, so try experimenting until you find the perfect texture for your mousse. And once you’ve mastered this simple and delicious recipe, why not try some of our other kitchen experiments?
Images © SoraNews24
● Want to hear about SoraNews24’s latest articles as soon as they’re published? Follow us on Facebook and Twitter!
[ Read in Japanese ]