
 Our resident food writer Kuzo loves travelling the world in search of new and exotic McDonald’s food. However, he’s also been known to experiment with game consoles in between meals.
When the Nintendo Wii U came out he tested its online capability while riding nearly 300 km/h on the Shinkansen. Now with his newly acquired PS4, he’s going to attempt to upgrade the built-in hard disc drive (HDD) with a faster solid state drive (SSD). The following is his report.
***DISCLAIMER: The following is simply chronicling Kuzo’s experience with replacing a PS4’s hard drive. This is not intended to be an instructional piece, nor do we take responsibility for any damage caused by someone mimicking what he did – especially with all the food he had laying around. If you want to maximize the chances of a problem-free gaming experience you’re best to leave everything as it is.***
Swapping a PS4 HDD with an SSD
By Kuzo
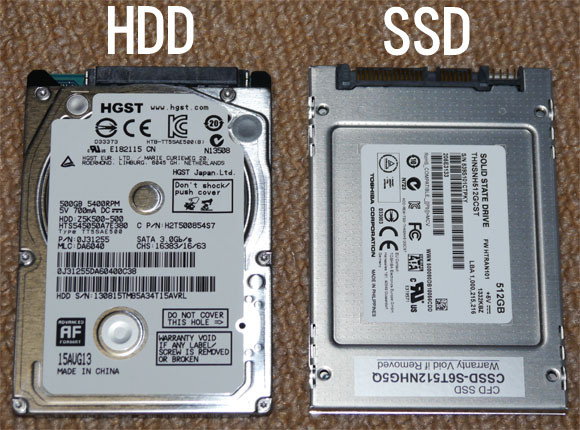
My PS4 has a 500GB HDD, but I attempted to replace it with a 512GB SSD to get faster loading speeds. Actually, I could have also upped the capacity to 800GB or even 1T but my budget was limited. To get the best bang for the yen I went with a similar sized SSD.
■ Checking the official site
Before going ahead with the swap I referred again to the Sony Computer Entertainment (SCE) website regarding the PS4’s hard disc drive.
“You can replace the built-in HDD. External HDD’s are not possible. The PS4 comes with a built-in SATA II 5,400rpm HDD. When replacing the HDD please use a 9.5mm thick drive with a capacity of at least 160GB. *We do not guarantee the compatibility of all types of HDD.” (SCE website)
Everything was set to go. Time to round up the equipment!
Some people would probably want to do this by-the-book and also get some rubber gloves to prevent static electricity along with some compressed air to blow away dust and a microfiber cloth for fingerprints all atop a nice sturdy table. But I figure I’ll just ground myself with sushi and work on the carpet instead.
■ Buying the HDD
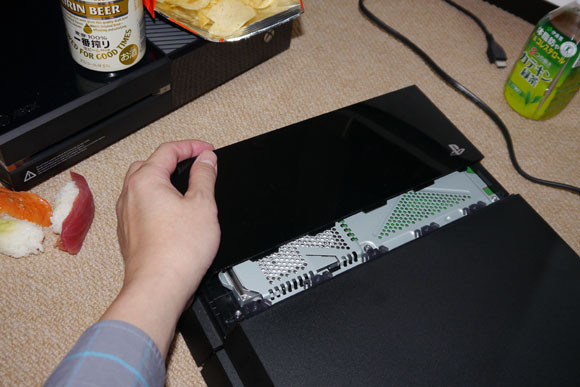
To get the replacement drive I went down to Akihabara and their numerous computer parts shops. Being an ametuer at this, the staff at a place called Dosupara were extremely supportive in helping me choose the right SSD for this situation. After considering speed, price, and capacity we decided on a Toshiba SSD HG5d by CFD Sales Inc. (CSSD-S6T512NHG5Q) for 36,580 yen (US$358).
■ Prepare the USB
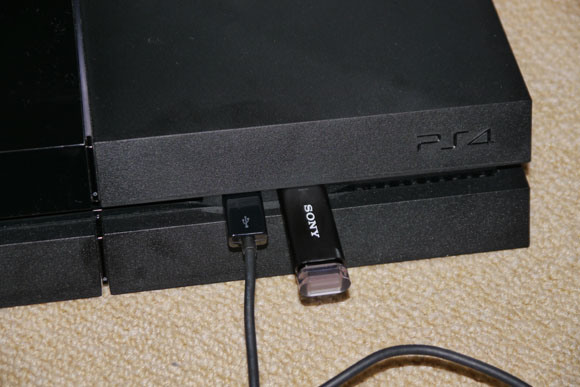
Before even touching the console I made sure I had the system software ready to install. I got a USB stick with at least 1GB of free space, and because I’m superstitious I made sure it was a Sony.
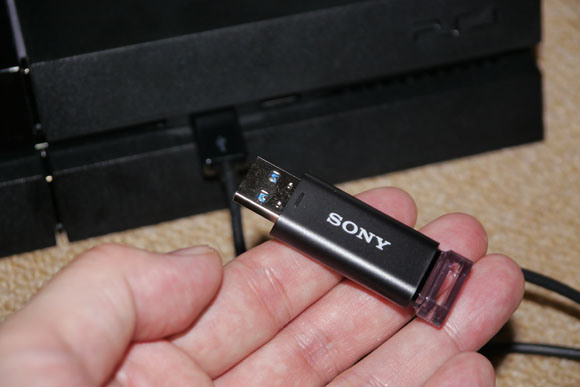
Then I downloaded the system software from the SCE website contained in a file named PS4UPDATE.PUP. I had to be careful though since there were two files with the same name. One was an update version (approx. 308MB) and another was a new install version (approx. 859MB). I wanted the new install since I was going to use a blank SSD.
On the USB stick I created a folder named “PS4” and inside that I made another folder called “UPDATE” which is where I saved the update file.
■ Removing the PS4 HDD
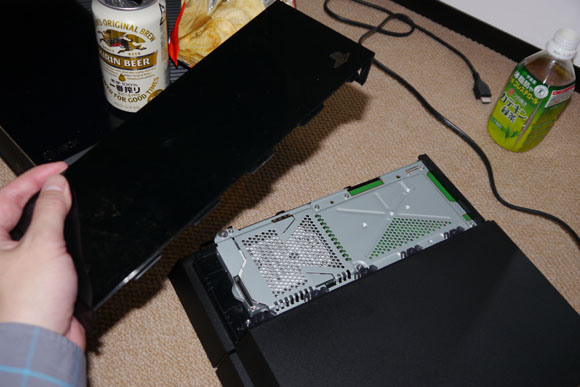
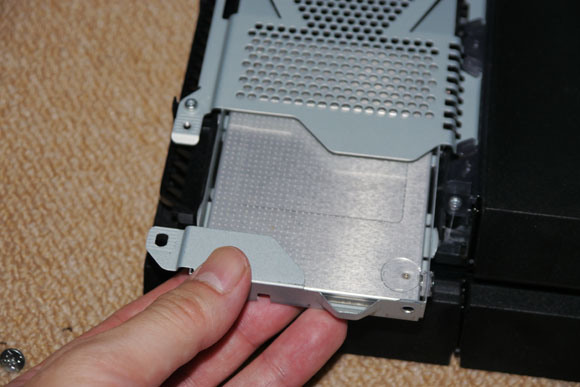
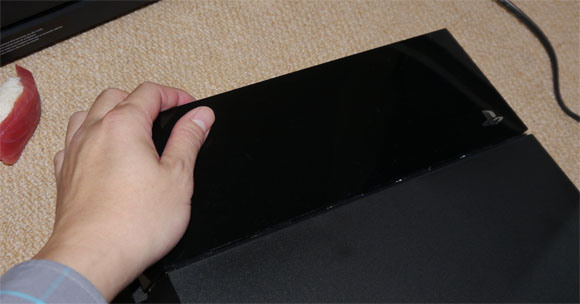
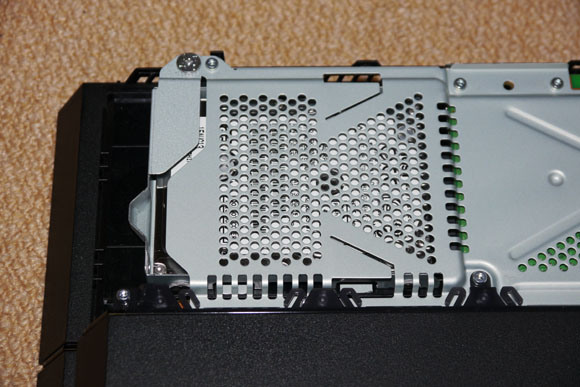
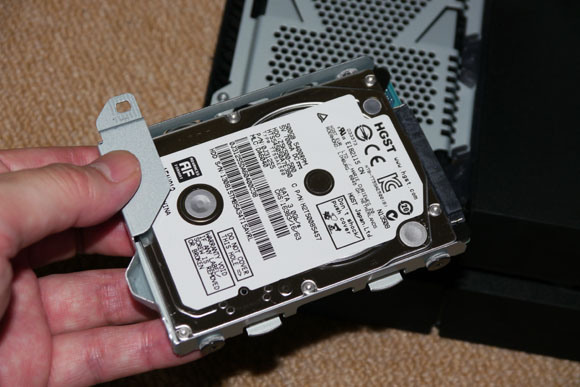
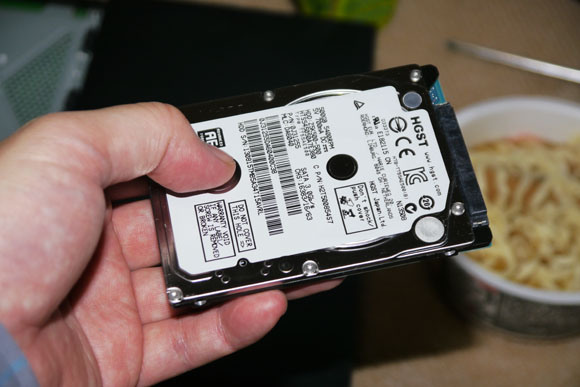
The exterior case of the PS4 had no screws. I just had to slide the shiny part of the black casing by grabbing it with both hands firmly yet gently. After that the HDD could be easily seen attached to a metal frame.
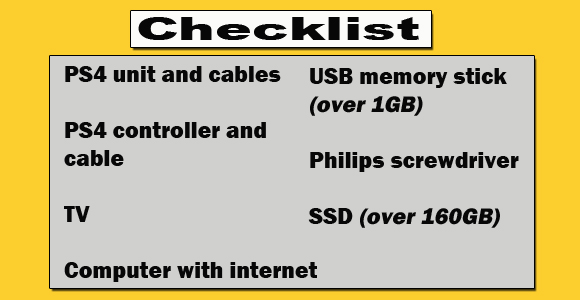
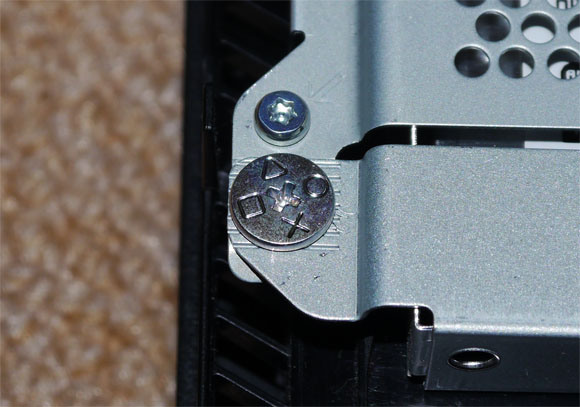
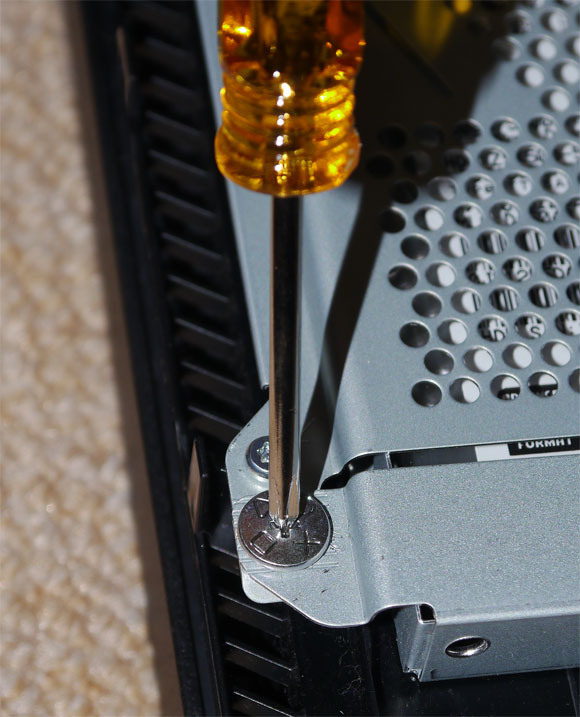
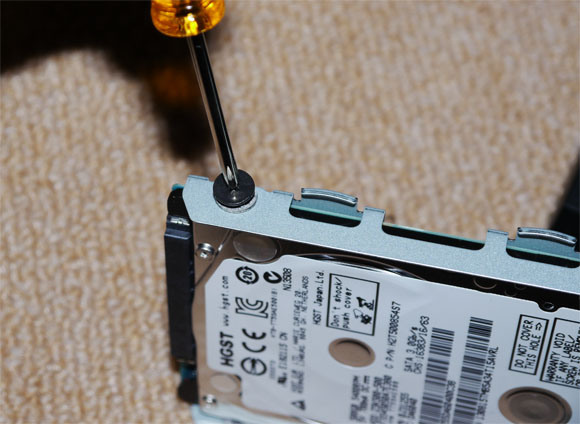
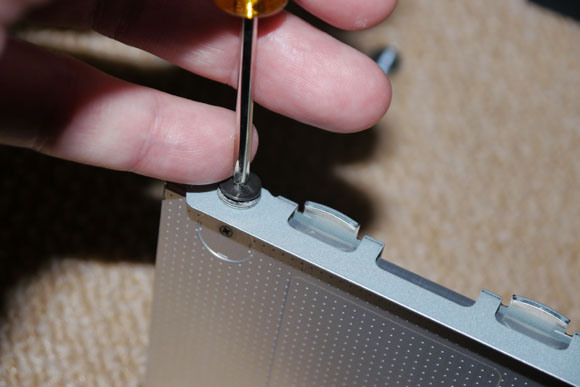
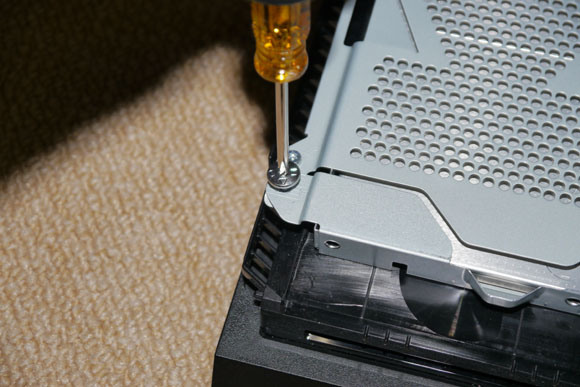
Only one screw held it to the unit and it was marked with the four symbols of the PlayStation controller (□△×○). I could easily get it out with my trusty Philips screwdriver. It was almost too easy.
■ Inserting the replacement SSD
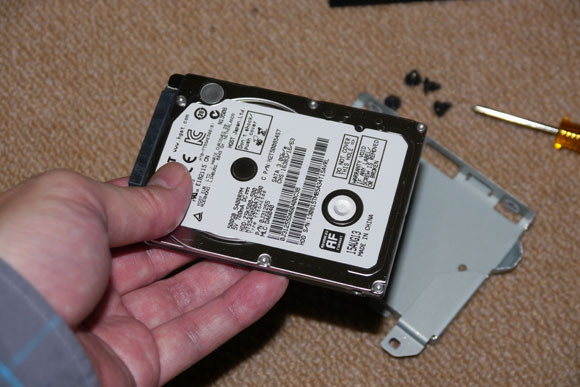
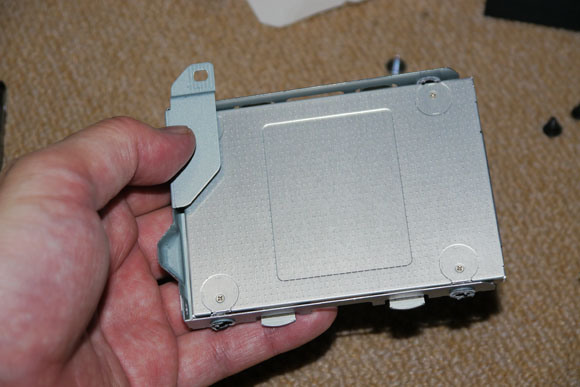
The HDD was still attached to a metal plate with four screws. After removing that I could fit the SSD in its place. Of course, I wasn’t about to toss out a perfectly good 500GB hard drive, so I kept the old PS4 HDD for a rainy day.
Making sure it was facing the right way, I simply screwed the SSD into the metal plate with the four screws, slid it into place on the unit’s metal frame and tightened the final □△×○ screw to lock it in.
■ Installing the software
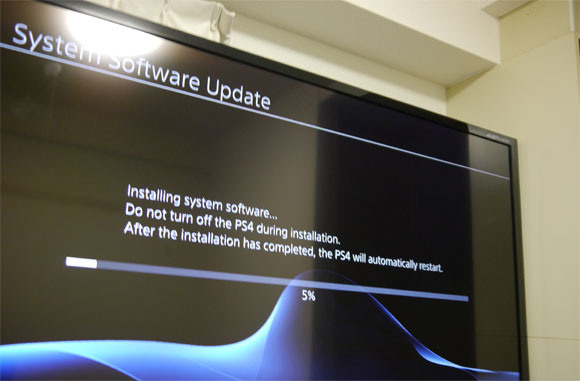
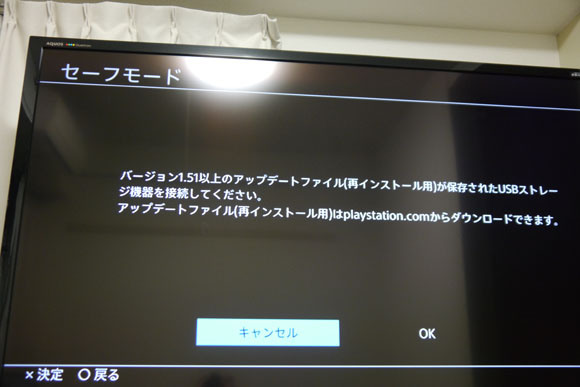
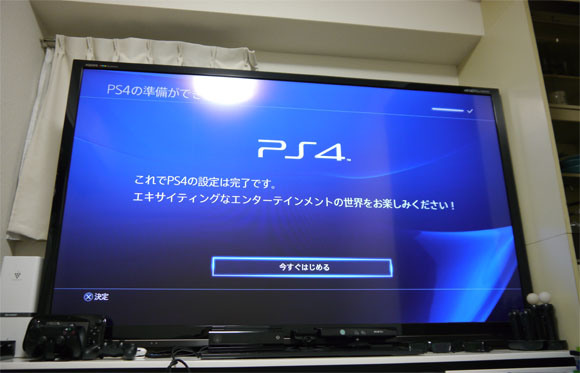
With the unit back together I hooked it up and inserted the USB that I had prepared earlier. I turned the power on and got a sudden shock at the error message that appeared on the screen. However, as I thankfully put the file in the right folders the install began after a moment. It worked!!
All in all it was surprisingly easy. I may have to try this again some time if the price of a 1TB SSD ever comes down. That being said if anyone wants to try something like this I highly recommend making sure you plan everything in advance. Research to make sure you’re using the right drive for the job and that you’re aware of the risk you’re taking with your machine.
Source: PlayStation (Japanese)
Original article by Kuzo
▼ The PS4 exterior comes off easily by sliding… and yes, that appears to be a piece of sushi on the floor
▼ It’s ridiculously easy. We also recommend using an Xbox One hold the beer and chips. Not the sushi though. It’s terrible at that.
▼ You can see the HDD right away
▼ It’s really nice of Sony to make this so easy to do!
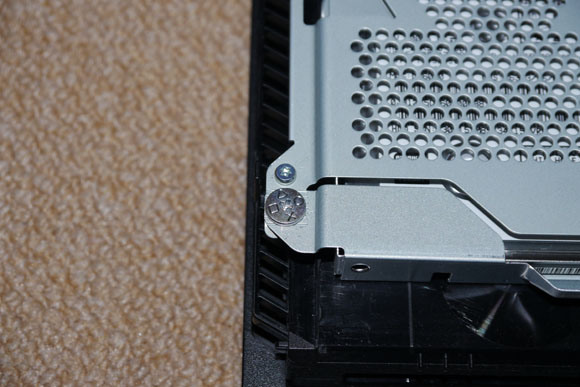
▼ The distinctive □△×○ marks help to keep it separate from other screws.
▼ Not a lot of force was needed on the screws.
▼ Just one screw and the HDD comes out easy.

▼ The HDD was attached to a bracket with four screws.
▼ The new SSD bought for about $350.
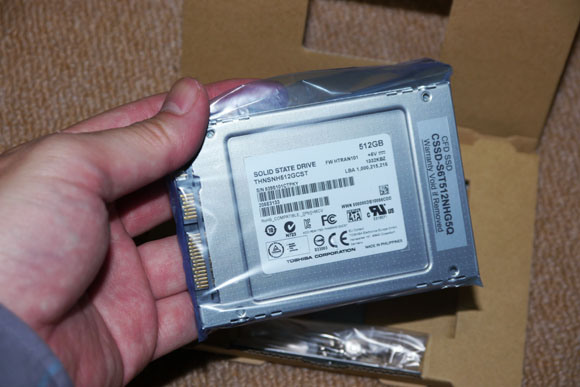
▼ It’s important to make sure the drives are both the same size.
▼ Thanks for the help HDD! But it’s time to step aside. It’s also time for some instant udon!
▼ It’s a little hard to tell from the picture but this is the new SSD attached to the metal plate.
▼ The SSD needed to be put in firmly to avoid errors.
▼ Then just needed to put the one screw in and slide the cover back on.
▼ The system software was stored on a USB stick.
▼ Put it in and turned on the power
▼ An error message will precede the install.
▼ Once this screen was seen, everything was alright.
▼ And the new solid state PS4 is up and running!
▼ The new sped-up PS4 didn’t even take long to verify… and will someone please pick up the sushi!

[ Read in Japanese ]
 PS4 undercuts Xbox One’s pricing by nearly $200 in Mexico
 We try to get the first PS4 sold in Japan, and so does this guy dressed like a Move controller
 Sony’s newest commercial for the Persona 5 PS4 bundle has 5,000 reasons to love it【Video】
 A chick, a fat guy and an Asian dude were standing in line for a PS4…
 Game dev berates gaming media on its “junior high school” analysis of PS4’s performance in Japan
 Hatsune Miku collaborates with Hokusai’s art in new Vocaloid ukiyo-e illustration series [Pics]
 Japan now has human refrigerators inspired by Japanese vending machines
 Studio Ghibli releases anime T-shirts that pay homage to one of Hayao Miyazaki’s most personal films
 Starbucks Japan releases new Discovery Series collection celebrating local regions and traditions
 Teen girl in Japan refuses to be victim, personally escorts train pervert to police for arrest
 Family Mart’s new Tokyo flagship convenience store doesn’t feel convenient, but is that a problem?
 Is Japan’s tourism boom slowing down? Foreign visitor numbers fall for first time in five years
 Evangelion beautifully reimagined as iconic classical Japanese folding screen art series [Photos]
 Mass murder plot stopped by friend of Akihabara mass murderer
 Cup Noodle unveils first-ever cold-water instant ramen in Japan
 Japanese government ID card and app to be required for certain Pokémon card purchases next month
 Uniqlo looks back to the very start of Pokémon with new black-and-white pixel art T-shirts[Pics]
 Studio Ghibli has a new anime out, and there’s only one place in the world where you can see it
 Family Mart opens new “Famima” flagship store in Tokyo that’s like a tourist attraction
 Japan announces sudden 400-percent increase in visa fees for foreigners entering the country
 Japanese ninja certification exam attracts 131 candidates from Japan and abroad
 Salomon releases Japan-exclusive Mt. Fuji hiking gear that doubles as an amazing souvenir
 Japan triples departure tax, foreign tourists and locals now must pay more to leave country
 Studio Ghibli store Donguri Republic announces opening of first-ever store in America
 Japanese sweets shop sells an ohagi so exquisite it sells out by noon
 Japan’s human washing machines will go on sale to general public, demos to be held in Tokyo
 Starbucks Japan releases new drinkware and goods for Valentine’s Day
 Starbucks Japan releases new sakura goods and drinkware for cherry blossom season 2026
 Japan’s newest Shinkansen has no seats…or passengers [Video]
 Put sesame oil in your coffee? Japanese maker says it’s the best way to start your day【Taste test】
 Japan reportedly adding Japanese language skill requirement to most common foreigner work visa
 Taiwan’s PS4 packaging is way cuter than anyone else’s
 PS4 release date in Japan to be announced on September 9 (hopefully)
 Resident Evil Umbrella Corps gets collaboration PS4 models
 Final Fantasy VII’s PS4 port now available
 Looking to make your PlayStation 4 stylish and unique? This real wood case may be just the thing!
 Japan’s most popular game console: PS4 sales to surpass Wii U
 So long, PlayStation 4 – Sony announces it’s ending repair service for early PS4 models
 Akihabara shop lets you destroy your own hard drives for only 100 yen
 Sony gives PlayStation 3 game cases a facelift, netizens complain they can’t tell games apart
 Get some Nintendo on your Sony with these PS4 skins (Oh, and they have an Evangelion one too!)
 Special edition Metal Gear Solid V PS4 is kind of uninspired, will probably sell by the bucketload
 PlayStation 4 impressions: An Xbox fan and a Sony lover go head to head
 PS4 20th Anniversary edition console sells at auction for jaw-dropping price
 Prince William would “love to have a PlayStation 4” but wonders if his wife will let him