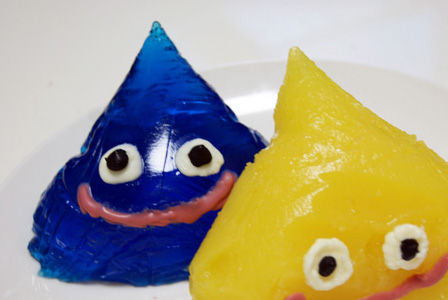
Dragon Quest fan? Hungry? Have a few spare minutes? You’re in luck, my friend!
Thanks to the culinary creatives over at Japanese website Bistro Animeshi, we’re about to bring you the first of what we hope will be many recipes for character and anime-themed food! That’s right, over the past few years we’ve tendered to your loins, tickled your funny-bones and now we’re aiming to tantalize your tonsils.
If it’s in the Ghibli movies, we’ll help you recreate it! If you once saw One Piece‘s Luffy shove it down his neck, we’re on it. From the tasty to the downright weird, we’re here to help you cook up your anime dreams.
Welcome… to Rocket Food!
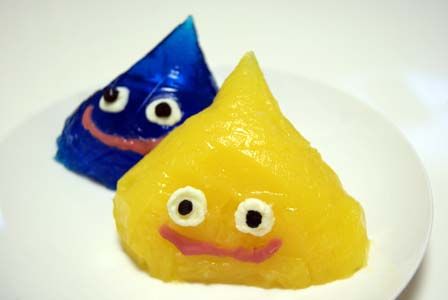
Slurp! Looks good, right? Care to make a few yourselves? Well, following Bistro Animeshi’s simple recipe, lovingly translated by the RocketNews24 team, now you can!
Since these recipes come from – of course – Japan, there may be one or two ingredients that you’ll have to substitute in or track down at an import store, but feel free to drop us a line in the comments section below if you ever need any clarification.
But enough talk; there are slimes to be made! Grab an apron, take a big gulp of elfin elixir and let’s get cracking.
Ingredients / utensils:
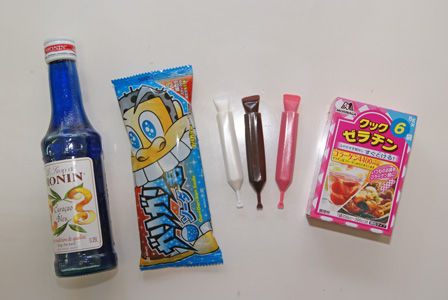
– Blue food dye or dark blue liqueur for grown-ups
– 1x Garigari Kun or similar blue soda (not creamed corn soup!!!) flavoured popsicle, thawed
– orange juice
– 3x icing pens (white, red, brown / black)
– 1x packet gelatin mix
– a couple of small, clear plastic sandwich bags
– some sticky tape (you’ll see why later)
– 1x mixing bowl, 1x weighted ceramic bowl or saucepan, whisk, 3x hair from a unicorn’s chin (can be imaginary)
Method:
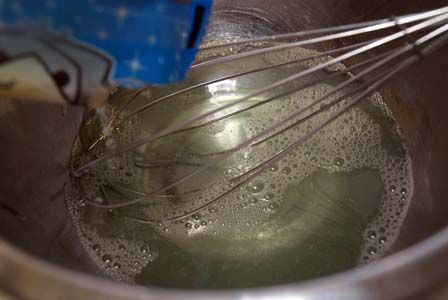
1. Add a sachet of gelatine to the bowl and pour in the specified amount of boiling water. Whisk throughly. Once the powder has completely dissolved, grab your melted Garigari Kun popsicle and pour the liquid it into the bowl with the water and gelatine.
Whisk it all up to ensure that the liquid and gelatine have completely blended. Smelling sweet? That’s a good sign.
Next, add your blue liqueur. The strength of the colour is entirely up to you, but we like ours good and videogame dark blue!
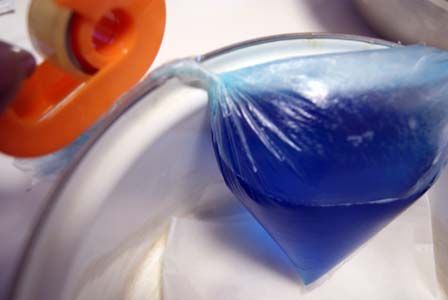
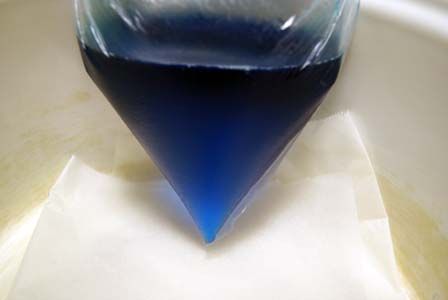
2. This part’s a little tricky. Pour your worryingly blue liquid from the mixing bowl into a plastic bag. Tie the end shut and twist the neck of the bag a few times. Now, carefully put the neck of the bag on the edge of your second (not too light!) bowl and use some sticky tape to hold the bag in place.
The liquid should be gathered in one corner of the bag and look something like this when viewed from the side. Stand on your head and you should start to see, yup, a blue slime!
With your little blue chap firmly held in place, put the bowl in the fridge to set the liquid.
3. While he’s chilling the fridge, it’s time to make your yellow slime. Don’t worry; this is a breeze.
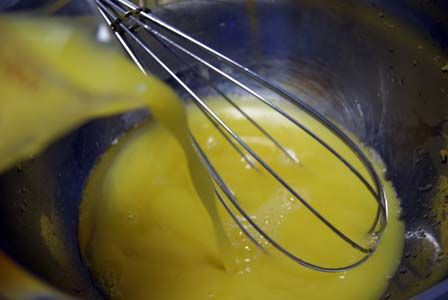
Instead of using a blue popsicle and food dye or blue liqueur, you can mix regular old orange juice with your gelatine powder. Of course, if you’re fond of orange or pineapple flavoured frozen desserts, you could substitute any of those in providing they melt down without leaving any unpleasant chunks.
Following the same method as above, pour your yellow slime liquid into the second bag and affix it to the other side of the bowl with tape, ensuring that the liquid goes into the corner with a nice point in the centre making the slime’s head. Get ’em in the fridge and let them have some face time while you read a few articles online. May we be so humble as to recommend this rather amusing video?
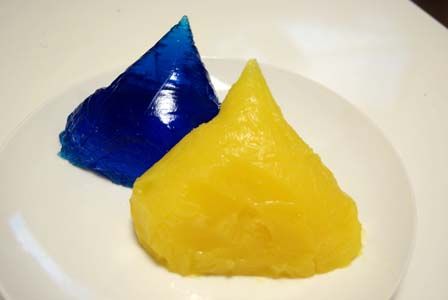
4. With the slimes thoroughly set, cut them out of their plastic bags and rest them flat-side down on a plate. Look at them there, wobbling and jiggling around. Let’s put a little life into them!
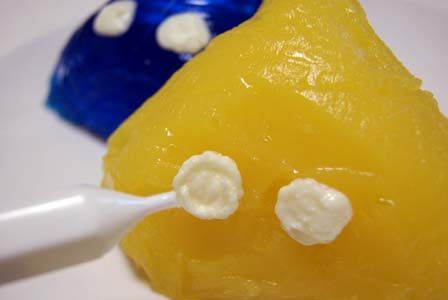
Grab your cake decorating equipment or icing pens and prepare to draw your slime’s faces. You’ll need a steady hand, but believe in yourself and you’ll make it through!
Start with white circles to make the outline of the eyes. If you need reminding of the size and position, just take a look at the image below. Once you have the eyes looking nice and even, give the icing time to set a little before adding the pupils.
Add the black or brown pupils to the centre of the eyes before slowly adding a nice, big pink mouth. Don’t worry if the mouth is crooked; have you ever seen a slime that didn’t smirk at you like it was about you invite you in for coffee in the middle of the night?
Leave the icing to set and you’re all done!
▼Perfect Dragon Quest slimes for kids and big kids alike!
Happy cooking, boys and girls!
Feel free to let us know if you have any anime or game recipes in particular that you’d like to see featured here on Rocket Food and we’ll do our best to help you out.
Give us a shout in the comments section below, via our Facebook page or on Twitter!
Source: ビストロアニメシ

 Slime bread arrives in Japanese convenience stores and in our Dragon Quest-loving bellies
 We try bright blue Dragon Quest slime curry, live to tell the tale
 Our Reporter Heads to Barcelona, Eats Delicious Dragon Quest Bubble Slime
 Dragon Quest Slime sandwich molds are drawing near in Japan
 Japan’s Dragon Quest Slime fish cakes draw near, and possibly for free【Photos】
 Cherry blossom forecasts map shows Japan’s OTHER sakura season is starting right now
 Japan has abolished advance deportation notifications to foreigners’ lawyers
 This gigantic judo dojo-sized hotel room will make you feel like royalty, but it’s disappearing soon
 Yokai are descending upon Tokyo this spring in the latest immersive art experience
 Japan has a new bar just for people thinking about quitting their jobs, and the drinks are free
 How to make a lucky sushi roll with KFC fried chicken skin【SoraKitchen】
 New list of inappropriate Japanese job interview questions from prefectural labor department
 Tokyo Station staff share their top 10 favorite ekiben
 We visited the southernmost and westernmost convenience stores in all of Japan…or so we thought
 Getting a driver’s license in Japan the hard way: The first driving test a few more times
 Japan’s Naruto theme park now offering real-world version of Minato’s kunai ninja weapon
 New Studio Ghibli stamps leave an impression on your stationery…and your heart
 Japan cherry blossom forecast update moves up sakura dates for many parts of the country
 Archfiend Hello Kitty appears as Sanrio launches new team-up with Yu-Gi-Oh【Pics】
 Studio Ghibli turns My Neighbour Totoro characters into bag charms for everyday adventures
 If you haven’t tried an antenna shop in Japan, you’re missing out
 Studio Ghibli releases Spirited Away bags in Japan, based on a mysterious festival
 Morning-after pill finally available in Japan without a prescription, must be taken at pharmacy
 Starbucks Japan releases new drinkware and goods for Valentine’s Day
 Japan releases first official sakura cherry blossom forecast for 2026
 10 times to avoid traveling in Japan in 2026
 Starbucks Japan releases new Frappuccino and latte for Valentine’s Day
 Our 52-year-old pole dancing reporter shares his tips for achieving your New Year’s exercise goal
 China’s don’t-go-to-Japan warning looks to be affecting tourist crowds on Miyajima
 Studio Ghibli releases new “komorebi” plush toys from Princess Mononoke and Spirited Away
 Ramen restaurant’s English menu prices are nearly double its Japanese ones, denies discriminating
 Survey asks foreign tourists what bothered them in Japan, more than half gave same answer
 Japan’s human washing machines will go on sale to general public, demos to be held in Tokyo
 We deeply regret going into this tunnel on our walk in the mountains of Japan
 Studio Ghibli releases Kodama forest spirits from Princess Mononoke to light up your home
 Major Japanese hotel chain says reservations via overseas booking sites may not be valid
 Put sesame oil in your coffee? Japanese maker says it’s the best way to start your day【Taste test】
 No more using real katana for tourism activities, Japan’s National Police Agency says
 Starbucks Japan reveals new sakura drinkware collection, inspired by evening cherry blossoms
 Updated cherry blossom forecast shows extra-long sakura season for Japan this year
 Slimes in your glass are a good thing as long as they’re awesome Dragon Quest ice cubes
 Japan’s Valentine’s chocolate Slimes let you say you say I love you like the Dragon Quest mascot
 Japan’s new old-school Dragon Quest sweets are Slime-like in more ways than one【Taste test】
 Enjoy some slime tea time with the Dragon Quest kyusu teapot from the Square Enix e-Shop【Photos】
 Mr. Sato Cosplays as Slime and Waits in Line 24 Hours to Purchase Dragon Quest X
 Dragon Quest Slime toys appear at McDonald’s Japan in crossover with Grimace and pals【Video】
 Japanese mom’s hand-made Slime masks draw near, boost kid’s cuteness and protection stats【Photos】
Leave a Reply