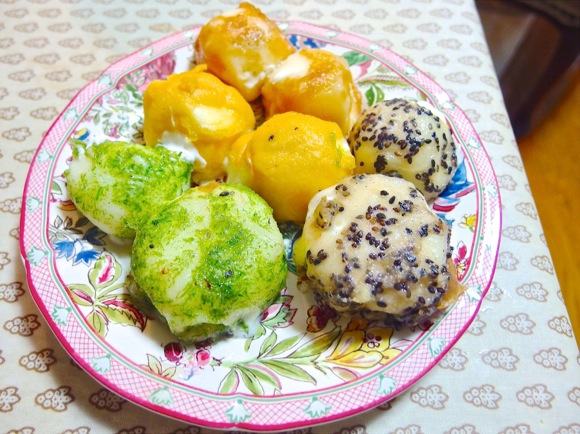
Snacks don’t get much more decadent than fried ice cream, but it can be intimidating to make for inexperienced fryers. Luckily we found that using Japanese ice cream snacks coated in gelatinous rice known as mochi instead really simplified things without sacrificing any of the taste.
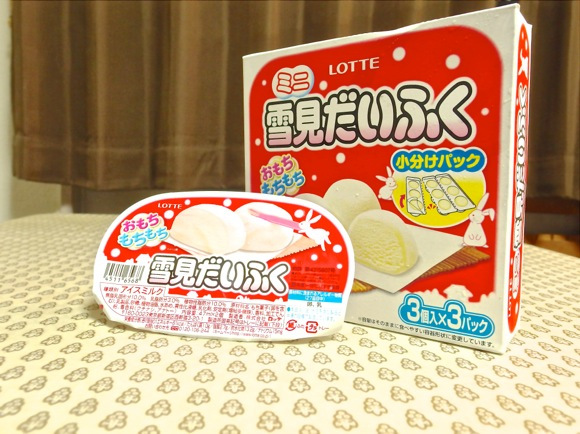
Naturally putting something frozen into scalding hot oil has a potential to go wrong, but with these frozen snacks there is a protective layer of mochi which gives the fried ice cream a little bit more structural integrity. Mochi ice cream is probably sold by different brands in other countries, but in Japan the go-to ones are the hugely popular Yukimi Daifuku, which just happens to be one of our top five ice creams.
This recipe we’re going to experiment with is taken from the website of Yukimi Diafuku’s distributor Lotte. Their version is called Fried Colorful Yukimi which uses special ingredients to add a splash of color to your fried ice cream. Here’s what we used.
Ingredients
Yukimi Daifuku – 9 mini & 2 regular-sized
Tempura Flour – 120g (4.2oz)
Water – 200mL (6.8oz)
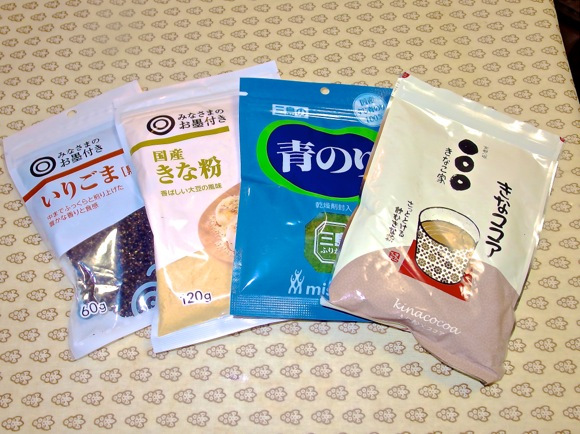
A suitable about of black sesame, cocoa, aonori (seaweed), and kinako (roasted soy bean powder), and frying oil
You may have to do some substituting for flavors available in your own area but any colorful powder with a salty or sweet taste should work out in the end.
And here’s what we did:
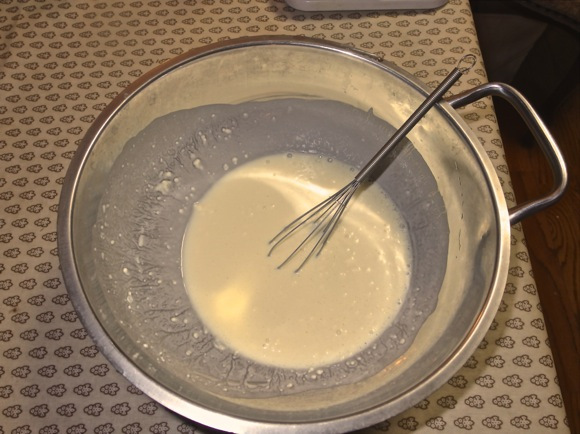
1 – Mix the tempura flour and water to make a batter. Preheat the oil to 200℃ (392℉)
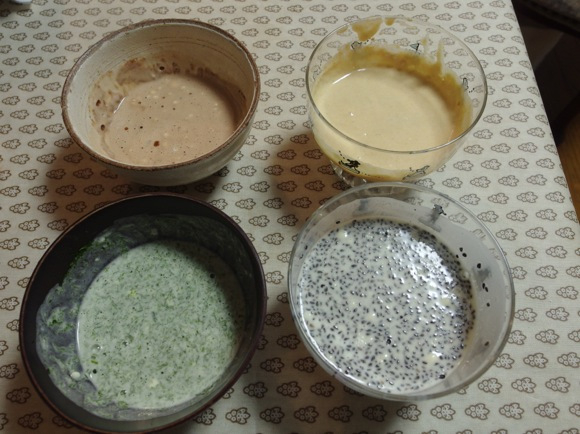
2 – Divide the batter into four small bowls. In each bowl mix in one of the black sesame, cocoa, aonori, and kinako.
3 – Make sure that the mochi ice cream balls are firmly frozen and coat them in the batter. Move quickly so they don’t begin to soften.
IMPORTANT: Make sure there are NO air pockets or bubbles between the ice cream and the batter!
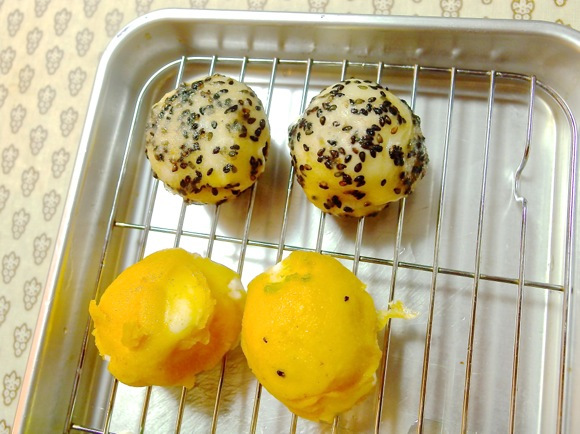
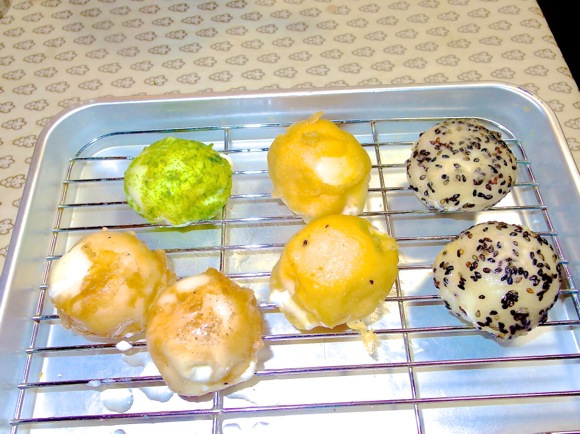
4 – Put one coated mochi ice cream into the hot oil for about two seconds. Then, flip over and fry again for about two seconds. Place it on a wire rack and begin frying the next coated mochi ice cream.
IMPORTANT: DO NOT fry too long and DO NOT attempt to fry a second time!
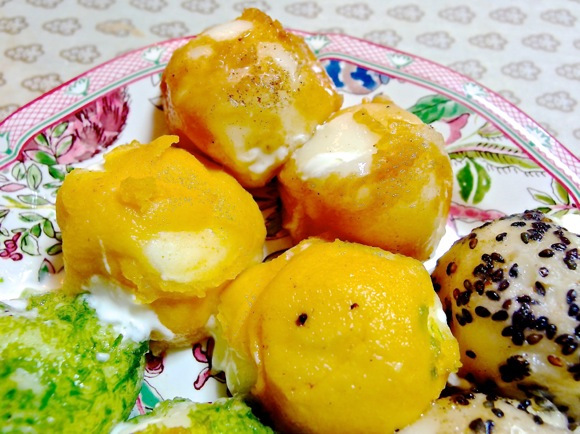
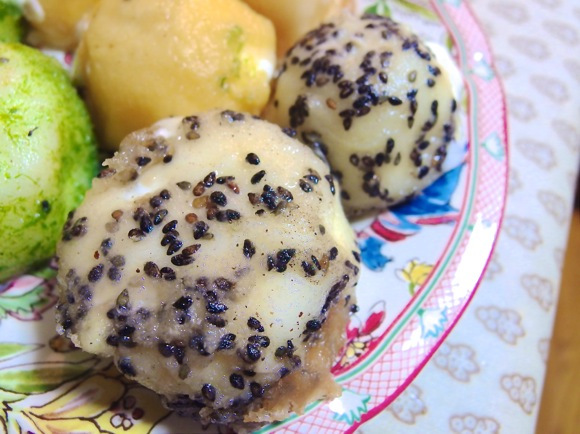
And that’s it! Ta-daa!
As far as actual labor goes, Fried Color Yukimi are quite simple. There are some tricky parts though. First, when adding the coated mochi ice cream to the oil substantial splashing occurred. Make sure you take the necessary precautions before frying to avoid injury or damage.
Also, although the mochi skin helps keep the ice cream intact it can be slippery pick up. Make sure you have the right utensils to retrieve them in the two-second window you are given. You may have noticed that we used 11 Yukimi Daifuku but only eight survivors can be seen in the photos. Some also ended up with bald spots from the retrieval!
That aside, the Fried Colorful Yukimi were really fast and easy to make. Of course, they tasted freaking awesome as well. The hot batter and cold ice cream melted and mingled in the mouth for creamy bliss.
The added flavors gave each fried mochi ice cream a distinctive character as well. Our writer Sachi Ojiya who did the frying said that the black sesame ones were the best followed by the aonori seaweed. The Lotte recipe lists several other batter flavors such as green tea powder.
Your imagination’s the limit, really. So, if you’re looking to take the first step into frying things that ought not be fried, using mochi ice cream is a great start!
Recipe: Lotte (Japanese)
Photos © RocketNews24
Original report by Sachi Ojiya
[ Read in Japanese ]


 Fried mochi ice cream ramen makes us rethink the way we eat noodles
 Fried mochi ice cream ramen appears in Japan to simultaneously hit three comfort food bullseyes
 Make your Japanese snacks even more Instagrammable with these mochi ice cream backgrounds
 Mochi ice cream ramen: Noodles will never be the same again
 Our Japanese reporter tries Yukimi Daifuku mochi ice cream for the first time (probably)
 Take a trip to Japan’s Dododo Land, the most irritating place on Earth
 Downloads of 39-year-old Guns N’ Roses song increase 12,166 percent thanks to Gundam
 Family Mart releases huge range of cute sweets for Cat Day in Japan
 In downtown Tokyo, we talk to a guy who says he’s from Orion’s belt, get called an “idiot”
 When Totoro met Baymax, and other cool anime crossover T-shirts you can buy
 Is China’s don’t-go-to-Japan warning affecting the lines at a popular Tokyo gyukatsu restaurant?
 Japan’s ultimate wagyu beef bento costs almost US$3,000, promises to be an unforgettable meal
 Netizens hatch adorable baby birds from supermarket eggs, provide evidence
 Nurture your inner cat collector with “Neko Atsume” the kitty-catching game for Android and iOS!
 Japan has abolished advance deportation notifications to foreigners’ lawyers
 Yokai are descending upon Tokyo this spring in the latest immersive art experience
 Three beautiful places to see Japan’s plum blossoms after starting your day in downtown Tokyo
 Cherry blossom forecasts map shows Japan’s OTHER sakura season is starting right now
 New Studio Ghibli stamps leave an impression on your stationery…and your heart
 Japanese women sound off on their minimum height requirements for a husband【Survey】
 Huge Evangelion Unit-01 head appearing in lights in Japan to celebrate anime’s 30th anniversary
 Kyoto planning surprise late-night inspections of Airbnb-style rentals to fight overtourism
 Japanese movie theater chain’s popcorn earns highest Grand Prix quality certification
 Japan’s most famous Mt. Fuji view park cancels cherry blossom festival because of overtourism
 Starbucks Japan releases new drinkware and goods for Valentine’s Day
 Japan releases first official sakura cherry blossom forecast for 2026
 10 times to avoid traveling in Japan in 2026
 Archfiend Hello Kitty appears as Sanrio launches new team-up with Yu-Gi-Oh【Pics】
 Starbucks Japan releases new Frappuccino and latte for Valentine’s Day
 China’s don’t-go-to-Japan warning looks to be affecting tourist crowds on Miyajima
 Our 52-year-old pole dancing reporter shares his tips for achieving your New Year’s exercise goal
 Studio Ghibli releases new “komorebi” plush toys from Princess Mononoke and Spirited Away
 Survey asks foreign tourists what bothered them in Japan, more than half gave same answer
 Japan’s human washing machines will go on sale to general public, demos to be held in Tokyo
 We deeply regret going into this tunnel on our walk in the mountains of Japan
 Studio Ghibli releases Kodama forest spirits from Princess Mononoke to light up your home
 Major Japanese hotel chain says reservations via overseas booking sites may not be valid
 Put sesame oil in your coffee? Japanese maker says it’s the best way to start your day【Taste test】
 No more using real katana for tourism activities, Japan’s National Police Agency says
 Starbucks Japan reveals new sakura drinkware collection, inspired by evening cherry blossoms
 Updated cherry blossom forecast shows extra-long sakura season for Japan this year
 Exploring the tastes and textures of Forbidden Yukimi Toast【SoraKitchen】
 Japanese mochi ice cream becomes latest TikTok trend
 Michelin-approved Japanese chef teaches us two gourmet-standard dishes using ice cream and toast
 Four “forbidden” super-easy Japanese toast desserts to make and eat ASAP【Recipes】
 Japan turns the confectionery world on its head with stretchy mochi-covered chocolates
 New Yukimi Daifuku mochi ice cream flavour is inspired by…Ogura Toast?
 Japanese survey reveals the top 10 most popular ice creams in Japan
 Starbucks has a mochi ice cream Frappuccino? New hanami dango hack goes viral in Japan
 Panic at the ramen restaurant as strange new gyoza dish arrives on menu
 It turns out deep frying grilled rice balls makes them amazingly delicious【SoraKitchen】
 Cold Stone now has sakura mochi ice cream in Japan for a limited time!
 5 of the best ice creams to try in Japan right now【Taste Test】
 Häagen-Dazs Japan’s delicious mochi ice cream makes a comeback this fall
 Häagen-Dazs releases new mochi ice cream, and it’s amazing! 【Taste test】
 You won’t believe how easy it is to make this delicious ice cream pudding!【Recipe】
 Häagen-Dazs’ awesome mochi ice creams with black sugar syrup and sweet miso glaze are coming back
Leave a Reply