

Okonomiyaki is one of the most popular foods cooked at home in Japan. One of Japan’s Top 10 Comfort Foods, the dish is fun to make with family or friends and best of all, it’s easy! Okonomiyaki is also popular with foreigners who when visiting Japan can sample the dish at any of the myriad specialty restaurants dedicated to this vegetable-rich meal.
So, what exactly is okonomiyaki? And how do you make it? Glad you asked!
Read on to find out more about this simple dish: watch a how-to video showing you how to make it, check out photos that show you some unusual ingredients, and get inside tips from Kazuko who regularly makes the dish for her seven grandchildren.
I recently saw this food defined as “pan-fried batter cake,” but don’t be fooled. It has nothing to do with baseball. Or cake. A vegetable pancake would be the closest description, but you can make the dish with or without meat. While it took me forever to learn how to pronounce the dish’s name (o-koh-no-me-ya-key お好み焼き) when I first came to Japan (I could only reproduce the word was by thinking of the Spanish “economia” and adding ki) it is easier to grasp once you understand a bit of Japanese.
Konomi means “your liking” , and is given the polite “o” that we often see placed in front of words like “obento” (boxed lunch) and “ofuro” (bath). The yaki part means “grilled.” Think tako-yaki (grilled octopus), yaki-tori (grilled chicken) and yaki imo (grilled sweet potato). Okonomi refers to the way it is prepared: to your liking, or in simpler terms “as you like it.” This results in no-rules-okonomiyaki, a great feast for anyone who loves to embellish recipes. And that’s pretty much everyone, right?
In order to get the very best advice on how to cook this no-holds-barred, anything goes dish, however, I decided to turn to a pro: my neighbor Kazuko.
I’ve lived next-door to Kazuko for almost 20 years and we’ve been through a lot together: her daughters’ weddings, family funerals, dog and cat-sitting, and now an array of grandchildren who come and go over the holidays. Her culinary skills have developed over many years and I have been a beneficiary as she has cooked for me as if I were another member of her family. And she cooks with ingredients straight from her vegetable garden!
So when I asked her to teach us here at RocketNews24 how to make okonomiyaki at home, she was happy to oblige, and brought over appliances and implements to my kitchen to make Kansai-style version. As I document our culinary mission, I’ve added some of her personal tips for making successful okonomiyaki. In the video, you can watch as Kazuko makes the dish herself.
What you’ll need
Restaurants cook okonomiyaki on a teppan grill, but most Japanese people have an electric grill they use at home on which they can make two or more pancakes at the same time. You can also use a frying pan and make them one at a time if you don’t mind waiting a little longer between “courses.” You’ll need a mixing bowl for the ingredients, a large spoon and two spatulas.
Ingredients:
You’ll need eggs, okonomiyaki flour, and cabbage and scallions make up the bulk of the mix. Most people will add more things, such as shredded carrot, mochi, corn, squid, shrimp or really, anything at all, or, “as you like it!” If it feels right, add it!
The toppings consist of okonomiyaki sauce (sweet and sticky), nori seaweed and dried bonito flakes. These are the basic toppings but you can add or subtract them as you like. Mayonnaise is also a very popular topping, preferably out of a squeeze bottle so you can make fun criss-cross patterns on top (see video at the end of the article).
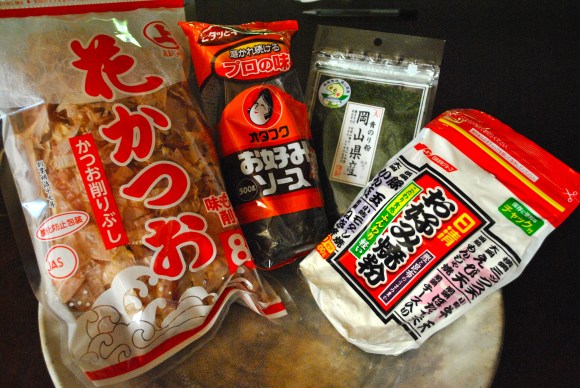
At the end of the article we also have a photo of the ingredients still in their packages, so you’ll know what to buy at the store.
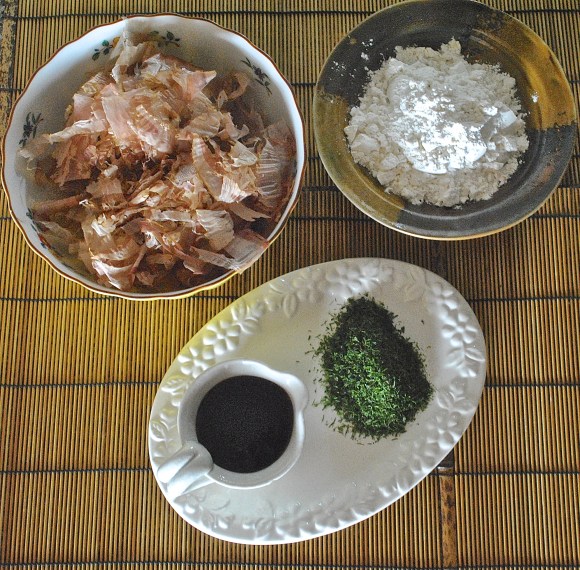
Here are the dry ingredients you’ll need.
▼Clockwise from top-left: katsuo bushi (dried bonito flakes), okonomiyaki flour, nori (seaweed) and okonomiyaki sauce.
These are the fresh ingredients you’ll need. Feel free to add whatever you like too.
▼Negi (scallions), egg, thin cuts of pork belly, and cabbage. We also added yamaimo, which is the long, brown root vegetable.

Preparing the Ingredients:

For two people (one pancake each) the recommended portions of ingredients are: one cup of okonomiyaki flour, 3/4 cup of water, one egg, 300 grams of cabbage, a few scallions (chopped, including the tops) and pork (one slice for each pancake). But if that’s not easy enough for you, just eyeball it and make it “as you like!”
Kazuko’s Tip No. 1: Instead of water, use dashi (Japanese soup stock) for a richer blend.
We made enough okonomiyaki for three people and used one half of a cabbage (shredded), two eggs, four scallions (use the tops too), unmeasured handfuls of okonomiyaki flour, a cup of corn, some dashi and a chunk of yamaimo.
Yamaimo, a tuber, goes by the formal name of Dioscorea polystachya. It’s slimy and kinda disgusting when eaten raw (it makes your mouth itch) but don’t worry, you won’t get that sensation when it’s mixed into okonomiyaki. If you’re new to yamaimo, you’ll need some instructions.
▼First, take the skin off the potato with a regular potato peeler or a fruit peeling knife. Next you’re going to grate it.
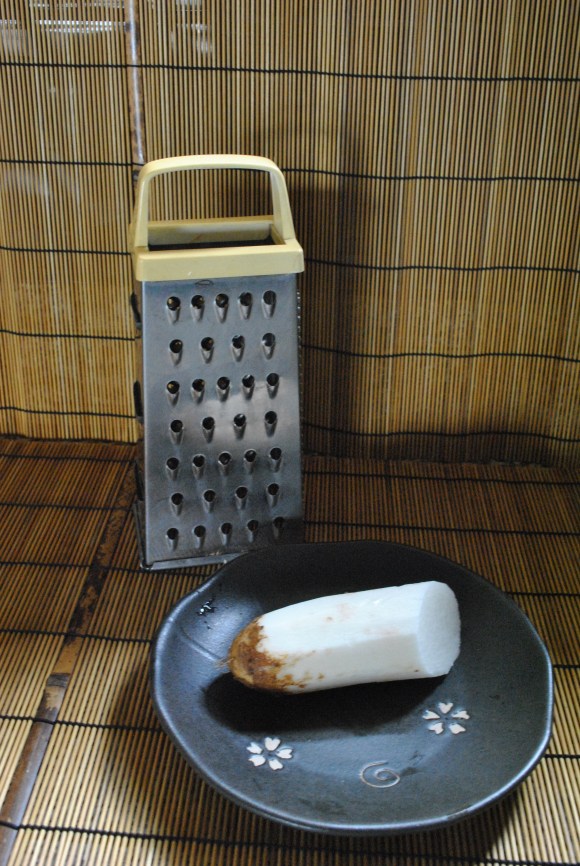
▼You can use a traditional box grater, but the Japanese graters with these funky holes work much better.

▼The yamaimo will be slippery in your hands but it’s very soft so will grate easily and quickly. It will also turn into a gooey liquid, which is good! It’s used as a binding agent, like raw eggs, so actually adds to the texture of okonomiyaki. I know, hard to believe.
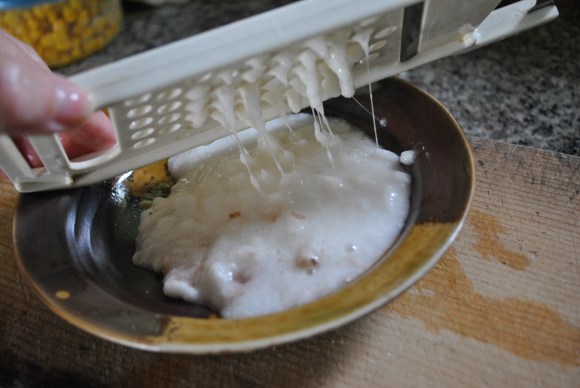
If you you’re a vegetarian or don’t want to use eggs in your batter, be sure to use yamaimo to bond the mixture.
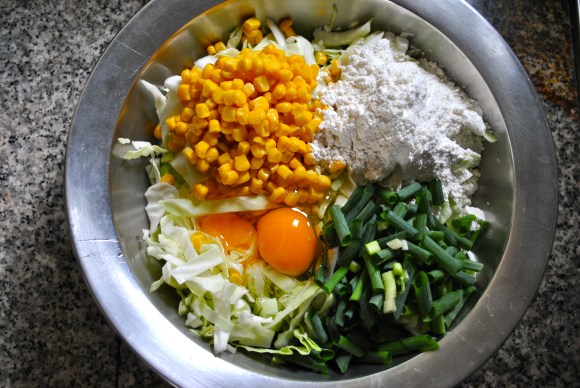
Mixing the Batter
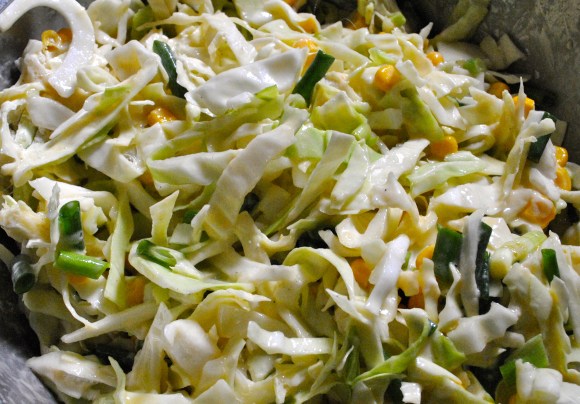
Put the cabbage, okonomiyaki flour, eggs, water or dashi, scallions, and all the other vegetables you’ve chosen into a large bowl and mix with a spoon.
▼The consistency should ultimately look like this, with a coating of batter visible on the vegetables.
Cooking the Okonomiyaki
Japanese electric hot plates have a special okonomiyaki setting, but you can put your element on medium heat and that should do the job. You’ll have to adjust the temperature and amount of cooking time accordingly; chunky vegetables and meat will take longer to cook so may need lower heat.
When the skillet is hot and ready to please, place a few ladles of the mixture onto the grill for each pancake. The pancake will be very thick and a bit unruly, but give it time and as the cabbage cooks, it will soften and the pancake will flatten out as it gets thinner. Don’t be tempted to press down onto the pancake with your spatula – some gentle shaping is fine, but too much pressure will result in a heavy, stodgy pancake.
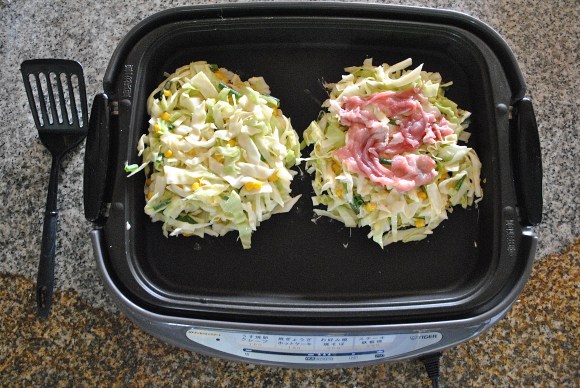
Kazuko’s Tip No. 2: Some people put the pork on the grill first, placing the ladles of batter and veggie mixture on top of it. Kazuko suggests, however, putting the meat in the middle of the pancake. Meat cooked on the inside of the mixture will be softer, she says. On the newer griddles, you shouldn’t need oil but if you’re using a frying pan, you can add a tiny drop of vegetable oil if you want.
▼We’ve made two pancakes, one meatless and one with meat.
▼Once the meat is placed on the pancake, add another dollop of cabbage mixture to cover it up.

You should have at least one spatula in your hand at all times so you can check the underside of the pancake to see how it is cooking and to make sure it isn’t sticking. Continue to give it love taps on the sides (see video) to keep it together and make sure the nice round shape is maintained.
Flipping the Pancake
When the bottom of the pancake looks golden brown, it is ready for a flip to cook the other side. This is the tricky part! Try to flip the pancake without breaking it into two (or more) pieces. Use two spatulas.
Kazuko’s Tip No. 3: If you’re having problems pulling off a successful flip, it may be because your batter is too thin. Add more okonomiyaki flour.
▼Nice flip job! Now you’ll need more love taps on the sides to regain the roundness.

Adding the Toppings
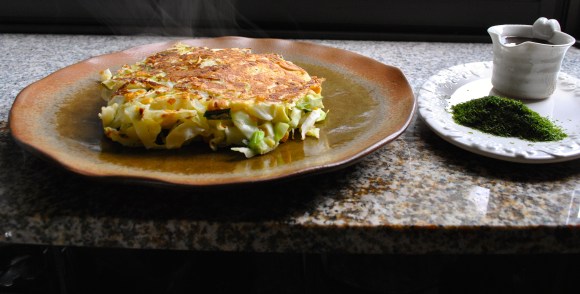
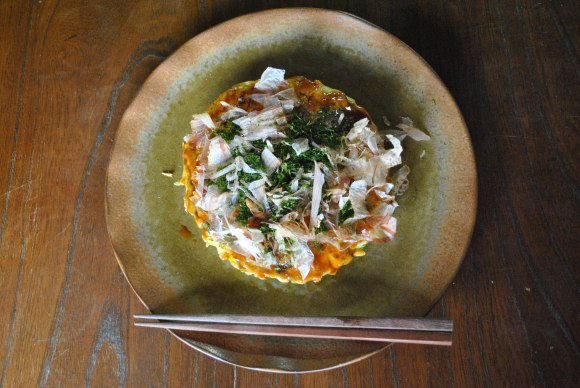
After more gentle taps and bottom checks, when the second side is golden and the meat has cooked thoroughly, use the two spatulas to take the okonomiyaki off the hot plate and put it on a dish.
Kazuko’s Tip No. 4: If your okonomiyaki is taking too long to cook all the way through, next time cut the cabbage into thinner slices so that it doesn’t take so long to cook. Smaller pieces of cabbage will also be easier for children and the elderly to eat.
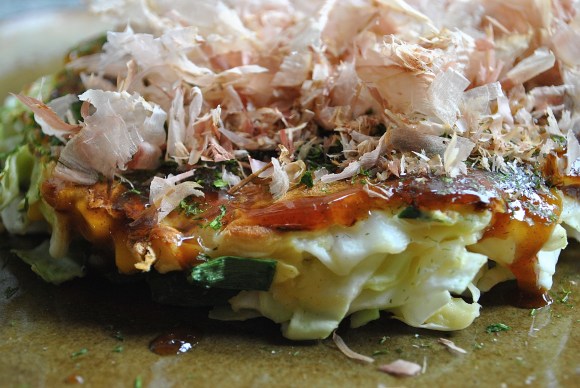
▼Now, ready for toppings!
The Japanese always brush on okonomiyaki sauce with a special brush (see video) but if you don’t have one, you can just pour it on and smooth it over with a spoon.
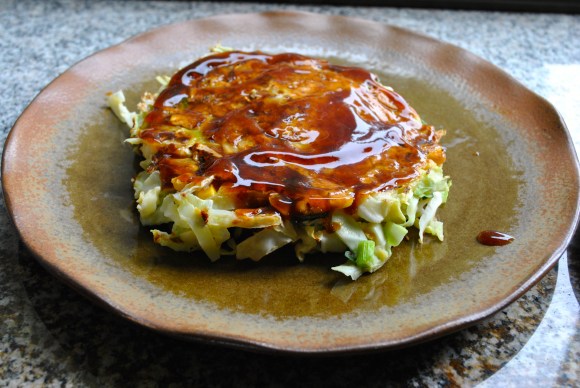
▼Next, layer the seaweed and katsuo flakes on top.
Some people choose to add mayonnaise (see video) or use a combination of toppings.
▼Tadaaaaaa! Ready to eat.
And you’re all done!
Here’s the cooking process in a super-speedy video. Be sure to add it to your favorites for easy reference later!
Thanks for joining us in the RocketKitchen! Now you are ready to make okonomiyaki as its name implies – as you like it! If you find some unusual but tasty ingredient, please let us know in the comments section!
▼Packaged ingredients, left to right: Katsuo bushi, okonomiyaki sauce, nori seaweed, okonomiyaki flour.
If you like okonomiyaki, you’ll surely like monjayaki too. Learn how to make it!
All images © Amy Chavez/SoraNews24
 Lawson convenience store teaches us how to make okonomiyaki with no knife or bowl 【SoraKitchen】
 Monjayaki, the popular Tokyo dish you’ve probably never heard of 【RocketKitchen】
 Rice cooker recipe: How to make a giant cheesy okonomiyaki pancake in a rice cooker
 Best all-you-can-eat okonomiyaki in Japan? Restaurant chain serves up a feast for under $14
 Hatsune Miku collaborates with Hokusai’s art in new Vocaloid ukiyo-e illustration series [Pics]
 Is Japan’s tourism boom slowing down? Foreign visitor numbers fall for first time in five years
 Evangelion beautifully reimagined as iconic classical Japanese folding screen art series [Photos]
 Cup Noodle unveils first-ever cold-water instant ramen in Japan
 Teen girl in Japan refuses to be victim, personally escorts train pervert to police for arrest
 Studio Ghibli releases huge new wooden clip collection featuring 25 anime movies
 Starbucks Japan adds new Frappuccino, Tea, and Chillax Soda to its limited-edition summer menu
 Can instant TKG from Don Quijote really recreate Japan’s beloved raw-egg-on-rice dish?
 Tokyo and Osaka make it into this year’s EIU ranking of the world’s Top Ten Most Liveable Cities
 Tokyo Disneyland and Disney Sea raising ticket prices, free Fast Pass ending next month
 Studio Ghibli has a new anime out, and there’s only one place in the world where you can see it
 Family Mart opens new “Famima” flagship store in Tokyo that’s like a tourist attraction
 Uniqlo looks back to the very start of Pokémon with new black-and-white pixel art T-shirts[Pics]
 Japan reacts to Donald Trump’s “Islamic Republic of Japan” remark
 Japanese airport rebrands itself as “Sushi Airport” to attract foreign tourists
 Japanese government ID card and app to be required for certain Pokémon card purchases next month
 Three new starter Pokémon Jets to fly in Japan, first begins carrying passengers this month
 Studio Ghibli theme park’s new dessert is a drinkable version of Hayao Miyazaki’s pilot daydream
 Solid gold Hedorah kaiju from the Godzilla series is now available to pre-order
 Japan announces sudden 400-percent increase in visa fees for foreigners entering the country
 Japanese ninja certification exam attracts 131 candidates from Japan and abroad
 Salomon releases Japan-exclusive Mt. Fuji hiking gear that doubles as an amazing souvenir
 Studio Ghibli store Donguri Republic announces opening of first-ever store in America
 Japan triples departure tax, foreign tourists and locals now must pay more to leave country
 Japanese sweets shop sells an ohagi so exquisite it sells out by noon
 Sanrio Character Poll announces winners, Hello Kitty absent from top 10 in many countries
 Japan’s human washing machines will go on sale to general public, demos to be held in Tokyo
 Starbucks Japan releases new drinkware and goods for Valentine’s Day
 Starbucks Japan releases new sakura goods and drinkware for cherry blossom season 2026
 Japan’s newest Shinkansen has no seats…or passengers [Video]
 Put sesame oil in your coffee? Japanese maker says it’s the best way to start your day【Taste test】
 Japan reportedly adding Japanese language skill requirement to most common foreigner work visa
 Move over ramen and udon, “cup okonomiyaki” has come to play*
 Cup Noodle maker’s super-easy recipe turns instant noodles into quick okonomiyaki【Recipe】
 Here’s the oldest recipe for Japanese curry in existence, and how it tastes【SoraKitchen】
 Microwavable okonomiyaki that you can eat with one hand? Yes, please!
 We visited the famous monjayaki street and ate until we burst!
 Japan’s longest-running okonomiyaki joint and the birthplace of Hiroshima style — We visit both
 We try making Nisshin’s Jijimi Korean Pancakes in a cup kit【SoraKitchen】
 We learn how to make tofu with this at-home make-your-own tofu kit【SoraKitchen】
 Testing Japan’s fluffy mayonnaise pancake cooking hack【SoraKitchen】
 Got a hankering for hanpen? Here’s how to make your own Japanese fish cakes【SoraKitchen】
 Celebrate Halloween with our recipe for jack-o’-lantern nikuman steamed buns【RocketKitchen】
 Taco Bell Osaka branches now selling okonomiyaki burritos, promise delicious fusion flavor
 Put a unique twist on your oatmeal by turning it into some Japanese comfort food
 How to make amazing sweet apple pancakes using a rice cooker 【RocketKitchen】
 How to make your own Pikachu Burgers!【RocketKitchen】