
Combination of two popular Japanese brands promise a “forbidden” level of tenderness.
Among the competitive array of frozen snacks in Japan, Yukimi Daifuku is a solid perennial favorite by combining the classic taste of vanilla ice cream with the quintessential Japanese treat of daifuku, which is sweet bean paste encased in the pummeled rice cake known as mochi.
▼ In the case of Yukimi Daifuku, vanilla ice cream is surrounded by a velvety layer of mochi
When put together it makes for a sweet and chewy snack, but hardly a component for a complete breakfast…until now!
Forbidden Yukimi Toast was originally developed by Yukimi Daifuku maker Lotte in early October. A few weeks later it caught the attention of Pasco, which produces the popular Chojuku brand of sliced bread.
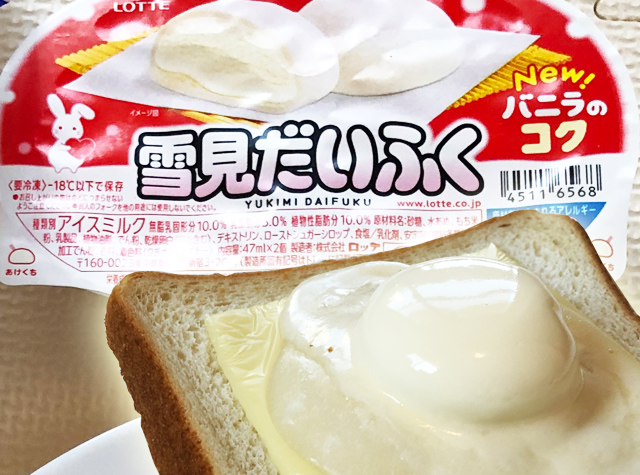
▼ Yukimi Daifuku’s original unveiling of Forbidden Yukimi Toast
/
— ロッテ 雪見だいふく (@yukimi_lotte) October 7, 2020
なぜ、人は雪見をトーストにのせるのか⁉️
\#雪見だいふく の新WEBCMが本日公開✨
雪見だいふくの新たな楽しみ方 #禁断の雪見トースト を雪見だいふく役に扮した #土屋太鳳 さんがご紹介😍
食パンに、チーズと雪見だいふくをのせて焼くだけ‼️
あなたも禁断の味を試してみませんか😋⁉️ pic.twitter.com/SwAyXejgVG
After complimenting each other on their respective products’ tenderness, Pasco offered to lend its expertise on bread to further enhance Forbidden Yukimi Toast. The result was the following recipe which I’ve just recreated for breakfast.
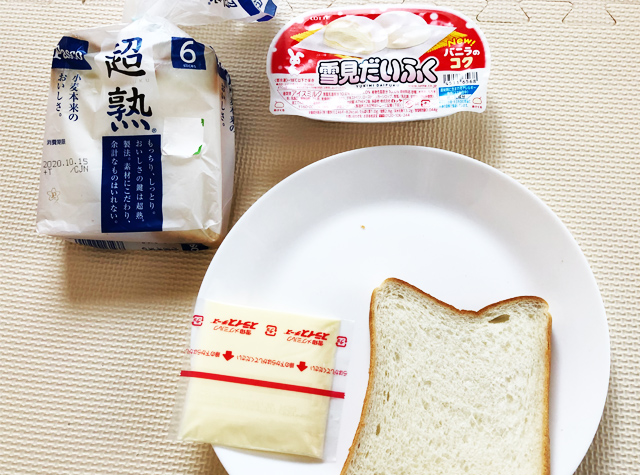
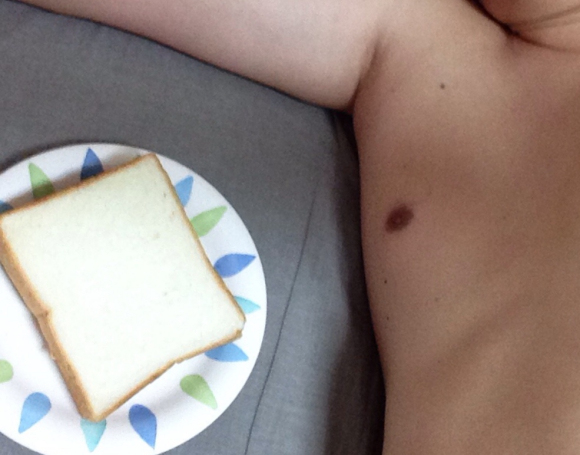
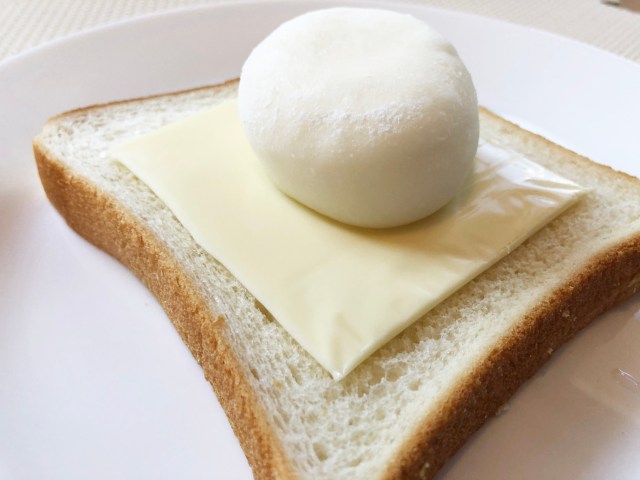
Ingredients
● One slice of Chojuku bread (from a 6-slice pack)
● One slice of cheese
● One Yukimi Daifuku
● Aluminum foil (or, failing that, aluminium foil)
For those unfamiliar with sliced bread in Japan, it tends to come in compact loaves that are sliced into four, five, or six. The size of the loaf remains the same, which means a four-slice pack will give you a mighty thick piece good for a light breakfast on its own, while a six slice piece is better for making a hearty enough sandwich with.
▼ Pasco Chojuku six-pack slice (left), and four-pack slice (right)
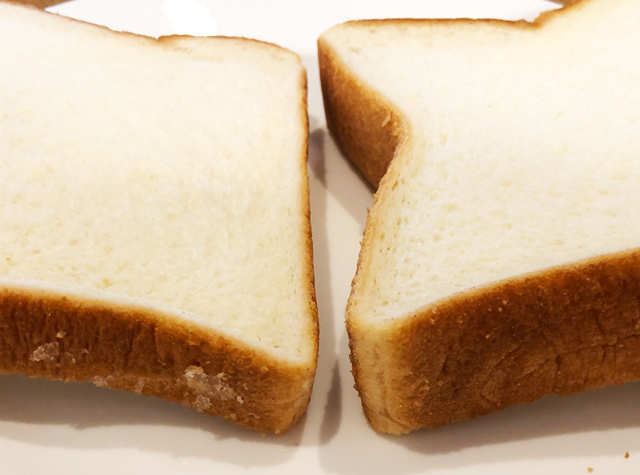
This is an important factor, as this recipe is very particular to texture. Pasco’s Chojuku bread actually is quite tender and probably your best choice when attempting this recipe. We even crowned it the best bread to cuddle with in 2015.
▼ Our reporter getting intimate with a slice of Pasco Chojuku
Since texture is the name of the game here and we’re dealing with ice cream, Pasco determined that temperature and moisture control are the most crucial elements to this recipe.
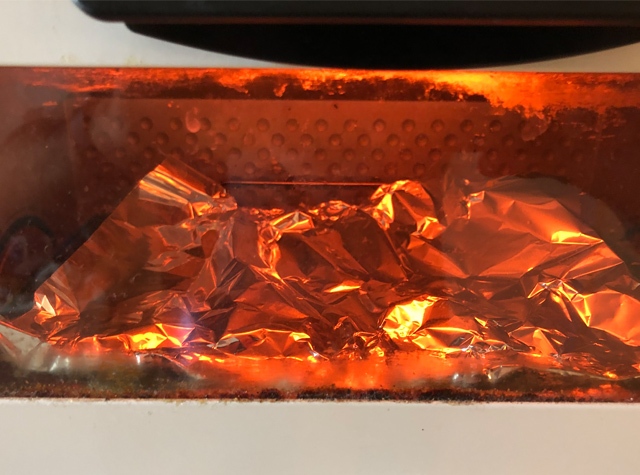
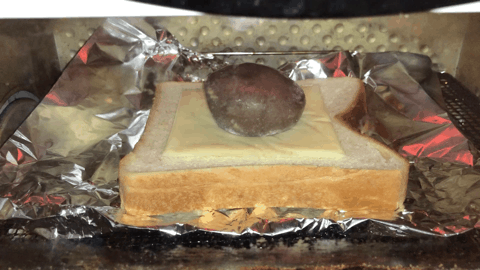
First, preheat your toaster oven and prepare a sheet of aluminum foil to place the bread on. Pasco says that both of these steps are important to keep the moisture in the bread at an optimum level and keep it soft.
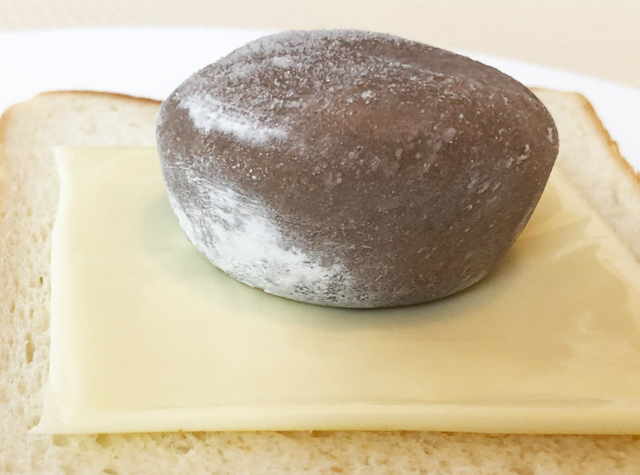
Then, prepare one slice of bread with a slice of cheese on top and set a Yukimi Daifuku out on a plate for about three minutes to soften up a bit. By this time the toaster oven should be sufficiently heated and you can place the bread, cheese, and Yukimi Daifuku all into the oven for about four minutes.
That’s right, this ain’t no a la mode nonsense. You are actually going to toast the frozen snack. Normally, toasting ice cream is an idea my cousin who enjoys smelling permanent markers might come up with, but Yukimi Daifuku’s mochi coating blends with the ice cream while melting to give it more cohesiveness, and therein lies the beauty of the Forbidden Yukimi Toast.
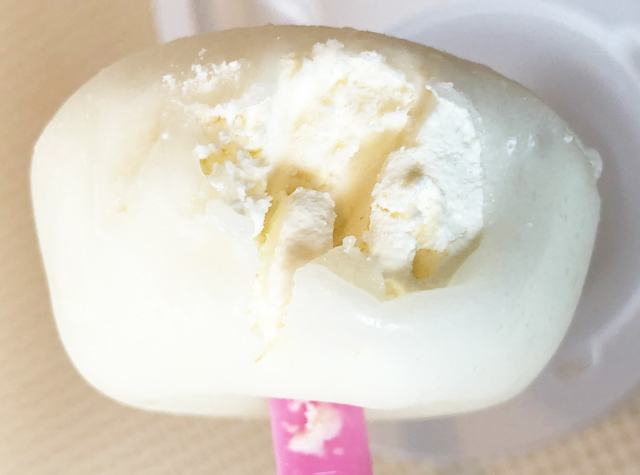
▼ Melting at 10x speed
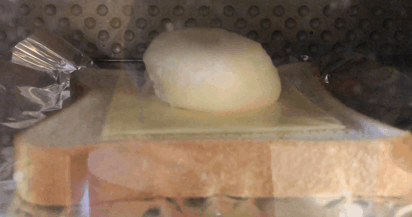
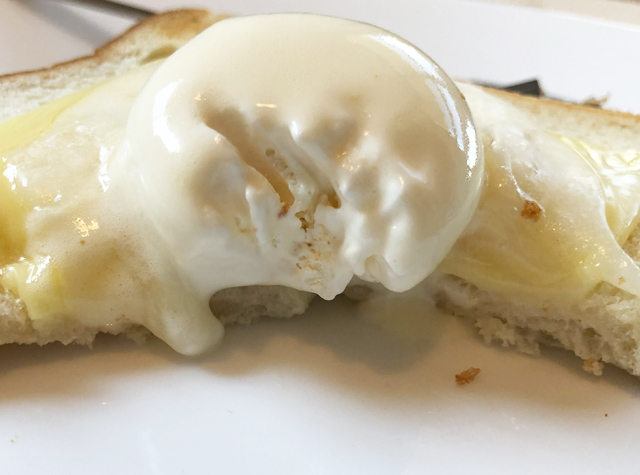
After four minutes of toasting the Yukimi Daifuku was only somewhat melted and kind of resembled a poached egg.
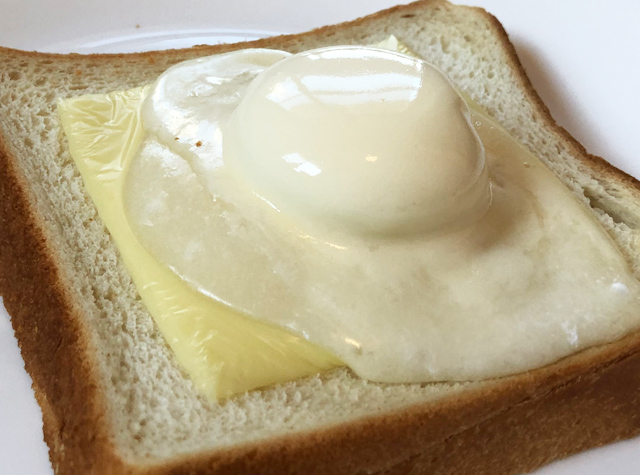
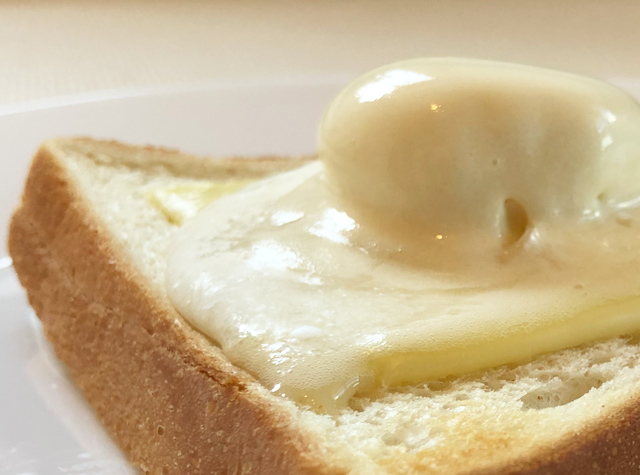
Still it all looked gooey enough that I decided to tackle it with a knife and fork. Thanks to Pasco’s advice the bread was still quite soft and combined with the cheese and ice cream it was a lot like a little cake.
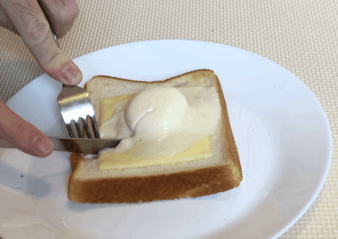
It was good but at this point I realized I had made a rather crucial mistake. When setting the Yukimi Daifuku out to thaw for three minutes and taking pictures of it, I had left it on top of the bread and cheese.
As a result, the cheese had become chilled and even after toasting was still a little firm, almost as if it was straight out of the fridge.
It still wasn’t bad though, because the smooth texture of the cold cheese complemented the velvety texture of the mochi surprisingly well. Still, I don’t think this was what best buddies Pasco and Yukimi Daifuku had intended.
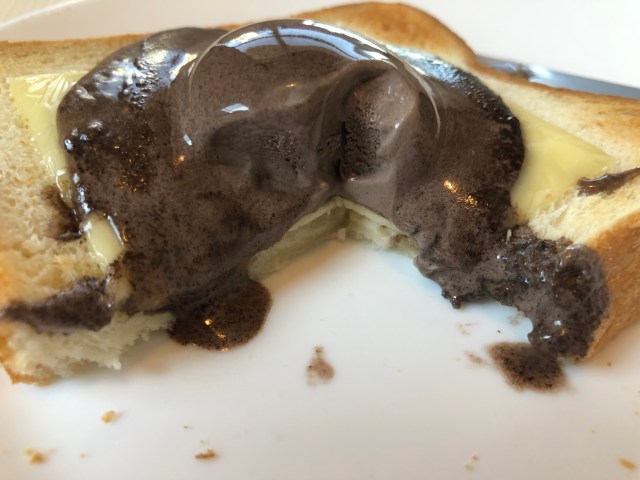
So, I set out to try again, but this time I decided to get really decadent and used a chocolate Yukimi Daifuku instead. These are the same as regular Yukimi Daifuku but with chocolate ice cream and chocolate blended into the mochi.
Making sure to keep it away from the cheese beforehand, I repeated all of the above steps. I also left it in the toaster about twenty seconds longer than before.
▼ The full toast at 10x speed
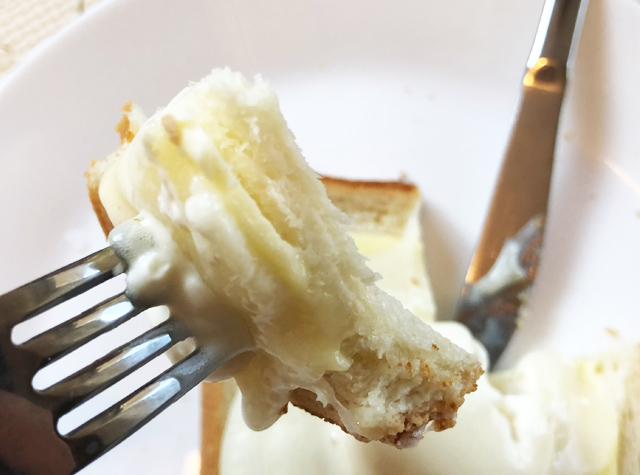
This time a bit of the bread was browned as was the mochi coating, but everything was still very tender. The cheese too had completely melted this time around and mingled in with the chocolatey mess.
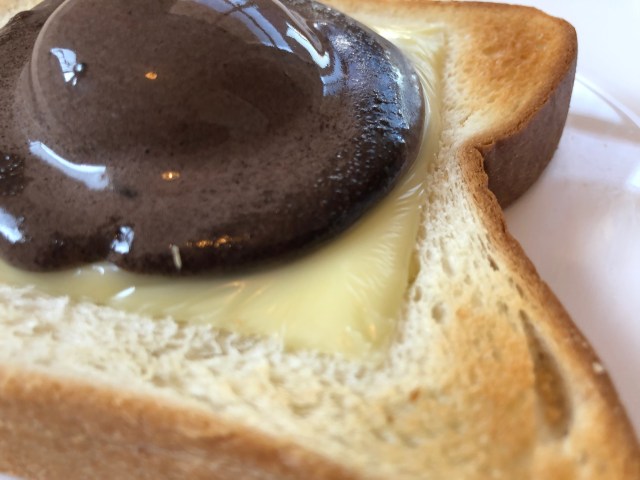
This one was a lot more sweet and creamy but everything blended together in a delicious way. Actually, even though the first attempt was a bit of a screw-up, I think the texture of the chilled cheese might have been slightly better because it really brought out the mochi component, which is what ultimately separates Forbidden Yukimi Toast from regular cheese toast a la mode.
In the end it is a nice dish for those who appreciate the subtle texture of their foods. For those who don’t really care about that stuff, however, Forbidden Yukimi Toast probably won’t bring much more to the table than other ice cream and bread combinations.
Also, considering how easy it is, I could see this being a really fun treat to make with kids, if you happen to be stuck at home on a rainy afternoon.
Source: Twitter/@yukimi_lotte via Netlab
Photos ©SoraNews24
● Want to hear about SoraNews24’s latest articles as soon as they’re published? Follow us on Facebook and Twitter!
 Four “forbidden” super-easy Japanese toast desserts to make and eat ASAP【Recipes】
 Michelin-approved Japanese chef teaches us two gourmet-standard dishes using ice cream and toast
 New Yukimi Daifuku mochi ice cream flavour is inspired by…Ogura Toast?
 This French toast recipe that uses ice cream will knock your pajamas off【SoraKitchen】
 Fried mochi ice cream tastes amazing, is super easy to make!【Recipe】
 Tokyo subway installing new ticket gates that don’t accept payment through Suica or other IC cards
 Japanese Shinkansen becomes an overnight hotel for three nights this summer
 Face lettuce appears in Japan, with the face of Death Note’s Light Yagami, but why?
 Giant Evangelion Spear of Longinus to be installed at Japanese train station with Eva art trains
 Starbucks Japan releases a miniature display rack so you can create your very own store at home
 Japanese Coo-Che becomes a viral sensation, and everyone wants a taste
 Dance with demons in Kyoto at this Edo-period Japanese Halloween festival
 Universal Studios Japan requiring consent form for adults-only horror attraction
 Why is Taco Bell failing in Japan, even as the country falls in love with tacos?
 New Shinkansen luggage drop-off system begins in Japan, making train travel even easier
 Japan now has human refrigerators inspired by Japanese vending machines
 Studio Ghibli releases anime T-shirts that pay homage to one of Hayao Miyazaki’s most personal films
 Hatsune Miku collaborates with Hokusai’s art in new Vocaloid ukiyo-e illustration series [Pics]
 99-year-old woman rescued while attempting to climb Mt. Fuji
 Japanese convenience store releases Japanese convenience store-flavor fried chicken
 Which country’s foreign tourists spend the most money per-person in Japan? Hint: Not the U..S. or China
 Family Mart’s new Tokyo flagship convenience store doesn’t feel convenient, but is that a problem?
 Studio Ghibli has a new anime out, and there’s only one place in the world where you can see it
 Salomon releases Japan-exclusive Mt. Fuji hiking gear that doubles as an amazing souvenir
 Japan triples departure tax, foreign tourists and locals now must pay more to leave country
 Family Mart opens new “Famima” flagship store in Tokyo that’s like a tourist attraction
 Sanrio Character Poll announces winners, Hello Kitty absent from top 10 in many countries
 Japan announces sudden 400-percent increase in visa fees for foreigners entering the country
 Japan’s human washing machines will go on sale to general public, demos to be held in Tokyo
 Starbucks Japan releases new drinkware and goods for Valentine’s Day
 Starbucks Japan releases new sakura goods and drinkware for cherry blossom season 2026
 Japan’s newest Shinkansen has no seats…or passengers [Video]
 Japanese ninja certification exam attracts 131 candidates from Japan and abroad
 Put sesame oil in your coffee? Japanese maker says it’s the best way to start your day【Taste test】
 Mochi ice cream ramen: Noodles will never be the same again
 Fried mochi ice cream ramen appears in Japan to simultaneously hit three comfort food bullseyes
 Our Japanese reporter tries Yukimi Daifuku mochi ice cream for the first time (probably)
 New Tokyo sweets shop offers 648 different mochi ice cream dumpling combinations
 Adorable AND delicious — Miffy Toast is the latest Japanese TikTok trend【SoraKitchen】
 Panic at the ramen restaurant as strange new gyoza dish arrives on menu
 How to make Disney’s Chocolate Peanut Butter Banana French toast at home【SoraKitchen】
 We put Japanese custard pudding on toast and it’s the best thing ever【SoraKitchen】
 Ultimate bachelor chow recipe: Cheeseburger-style furikake toast【SoraKitchen】
 Fried mochi ice cream ramen makes us rethink the way we eat noodles
 We try a method for making ice cream that doesn’t require a freezer【SoraKitchen】
 We make nori seaweed mayo toast, just like Mama Hatori used to make!【SoraKitchen】
 Japan’s new fruit sandwiches turn the concept inside-out, we make them even better【SoraKitchen】
 Japanese mochi ice cream becomes latest TikTok trend
 Do gohan no otomo, Japan’s traditional easy white rice toppings, work with toast?【SoraKitchen】