
92-year-old shares his recipe for making the best pickled plums.
Along with staples like rice and miso soup, pickles are a main part of Japanese cuisine, and the best ones, in our opinion, are the ones that are lovingly homemade.
So when this year’s season for pickling plums arrived in early summer, our Japanese-language reporter Go Hatori decided to take a trip out to his grandparents’ place to learn their secrets for making umeboshi (pickled plums), seeing as his grandfather has been making loads of them every year for as long as he can remember.
▼ At the age of 42, Go was finally at a stage in his life where he felt ready to inherit the recipe from his 92-year-old grandfather.
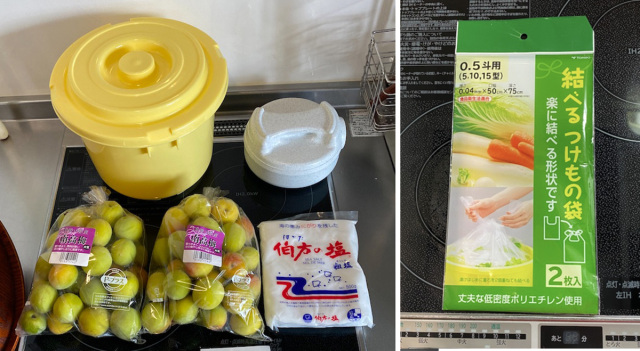
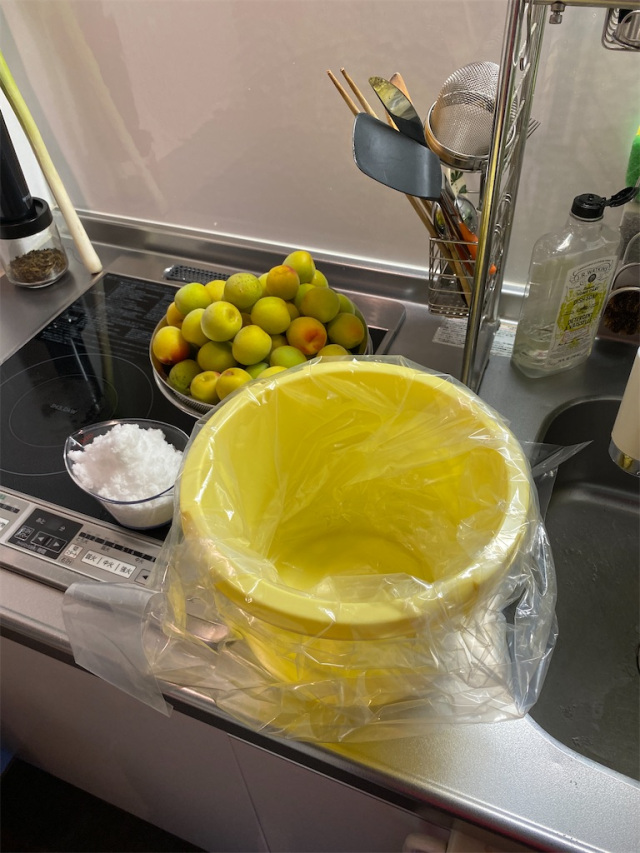
Before they got started with the long, multi-step process, Go prepared the following items:
・Nanko ume → This was Go’s first attempt, so he started with a relatively modest two kilograms (4.4 pounds) of Nanko plums, which are renowned for being the best quality plums in Japan.
・Red perilla → Buy the perilla as soon as it hits the market. More details on this later.
・Coarse salt → Go mistakenly picked up a salt that wasn’t as coarse as the one his grandfather usually uses, but it was still fine to use. Two kilos of plums with a salt content of 15 percent requires 300 grams (10.6 ounces) of salt.
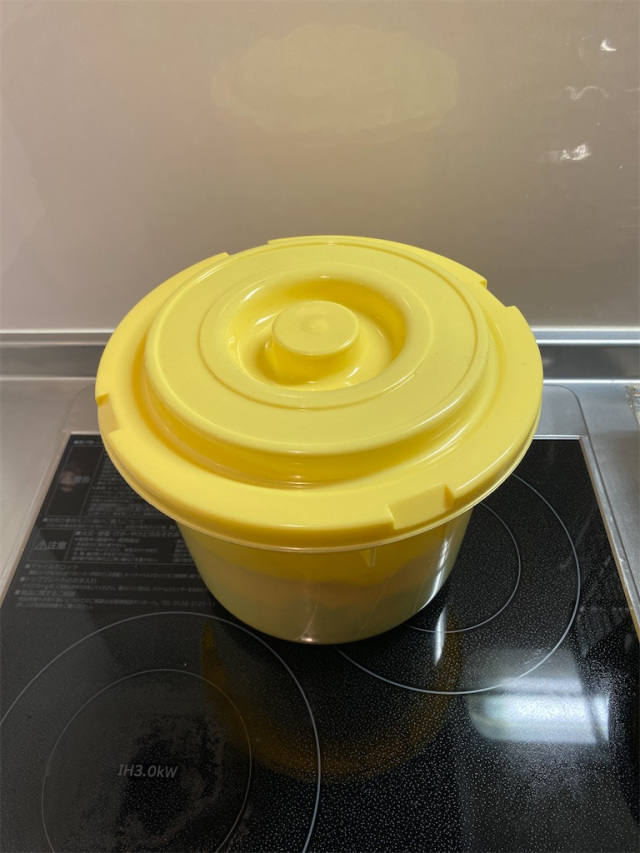
・Container → Go purchased a standard pickling container with lid for 503 yen (US$4.56) online, but any large glass or ceramic container works just as well.
・Weight → Go purchased a weight commonly known as a “tsukemono ishi” (“pickling “stone”) online for 990 yen, but again any weight (even a bag of pie weights) will do, as long as it’s roughly equal in weight to the weight of the plums you’re using.
・Pickling bag that can be tied → Go’s grandmother advised him that the lid of the pickling container might not close at first, once the plums are inside, so it would be better to seal the pickles with a bag to keep the contents safe from dust and insects.
Other handy items to have on hand are some long bamboo skewers, paper kitchen towels for cleaning the plums, and a large container to store the pickles in once they’re made.
As we previously mentioned, the process for pickling plums is a long one, but it’s well worth it, and Go got started with the first step on 20 June. This is the time when most families in the Tokyo area will begin pickling plums, although its possible to get started a week or two before this date.
Day 1
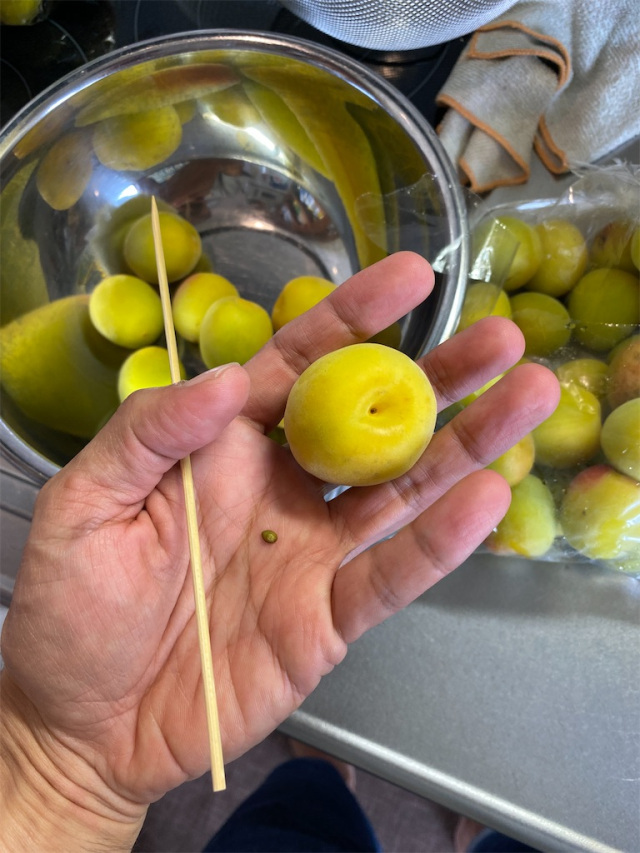
Step 1: Remove the hard tips in the navel-like cavity at the top of the plums with a bamboo skewer.
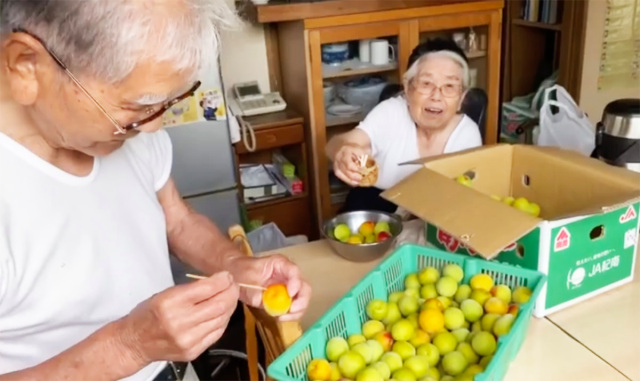
As Go’s grandfather demonstrates, you’ll want to take the hard tips off all the plums, being careful to avoid damaging the skin around it. In the photo below, you can see how the fruit has been cleaned of its hard tip, which is now resting on his palm and ready to be discarded.
Step 2: Wash the plums with water.
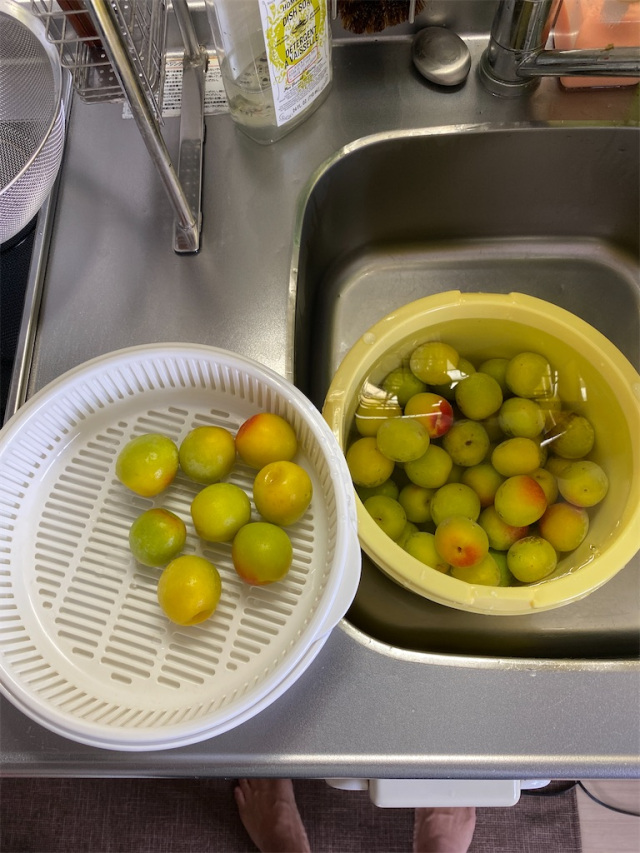
Step 3: Wipe the water off each plum, one by one, with paper towels.
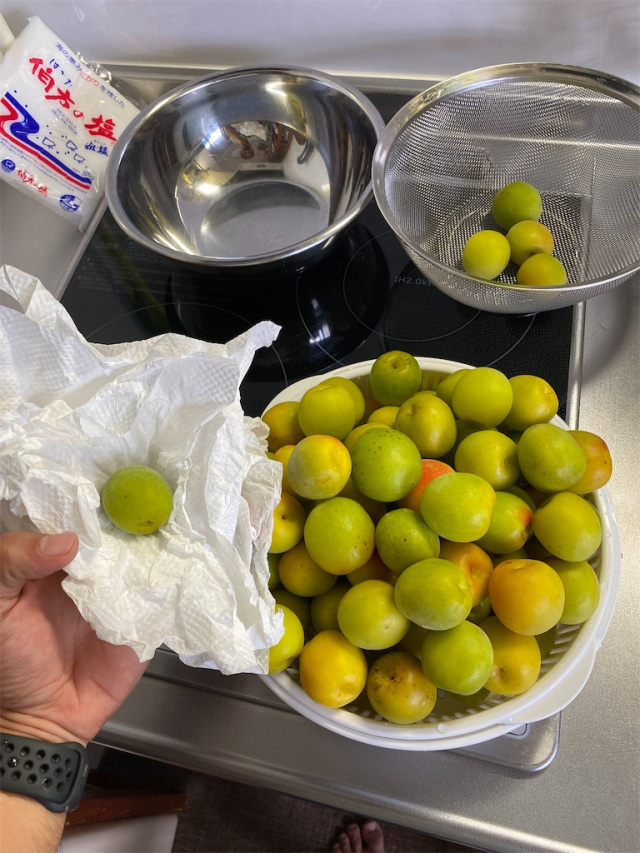
Step 4: Measure out 300 grams of of salt (this will create two kilos of umeboshi with 15-percent salt content).
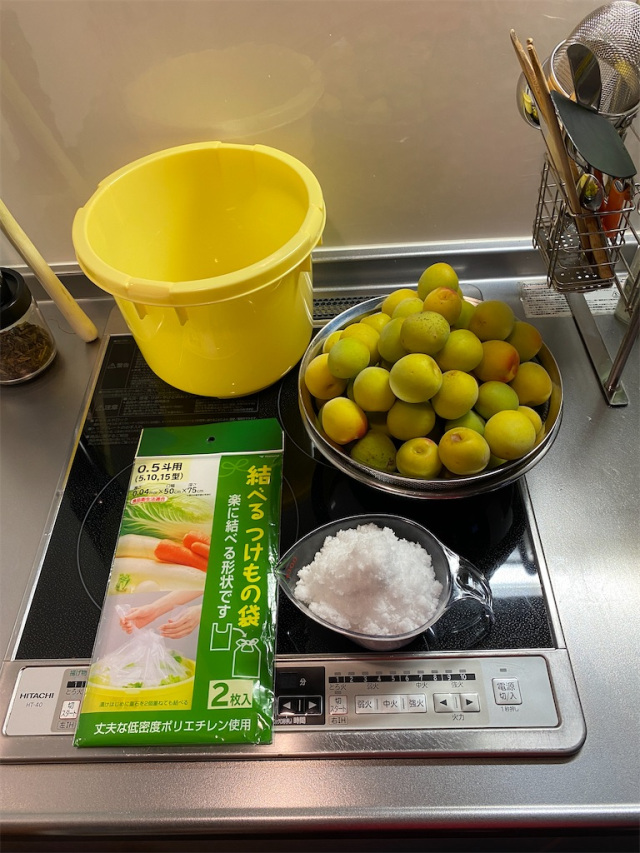
Step 5: Open the pickling bag and place it inside the container (other food-grade plastic bags can be used, as long as they can be tied at the top).
Step 6: Add a layer of plums and salt at the bottom of the bag.
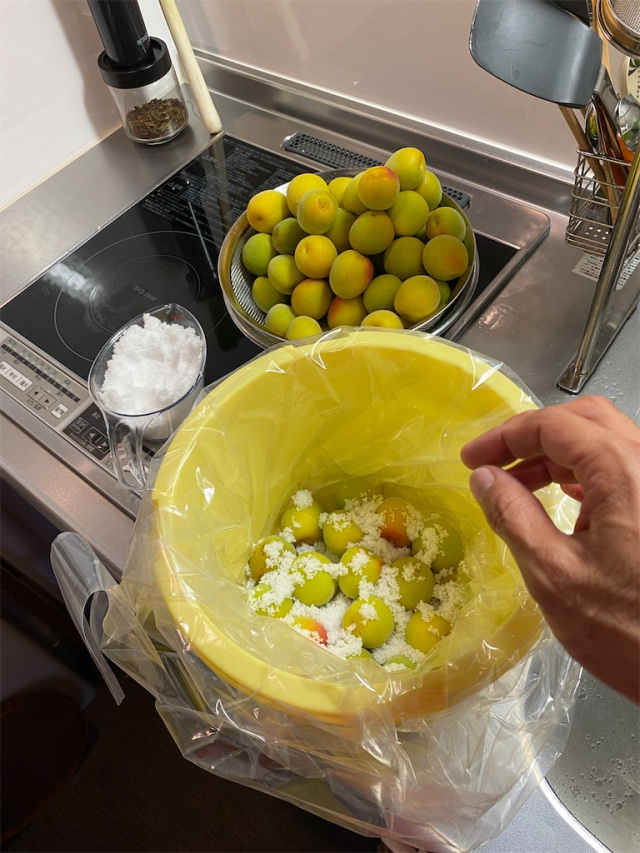
Step 7: Repeat this process, creating layers of plums-salt-plums-salt-plums-salt until all the plums are in the bag.
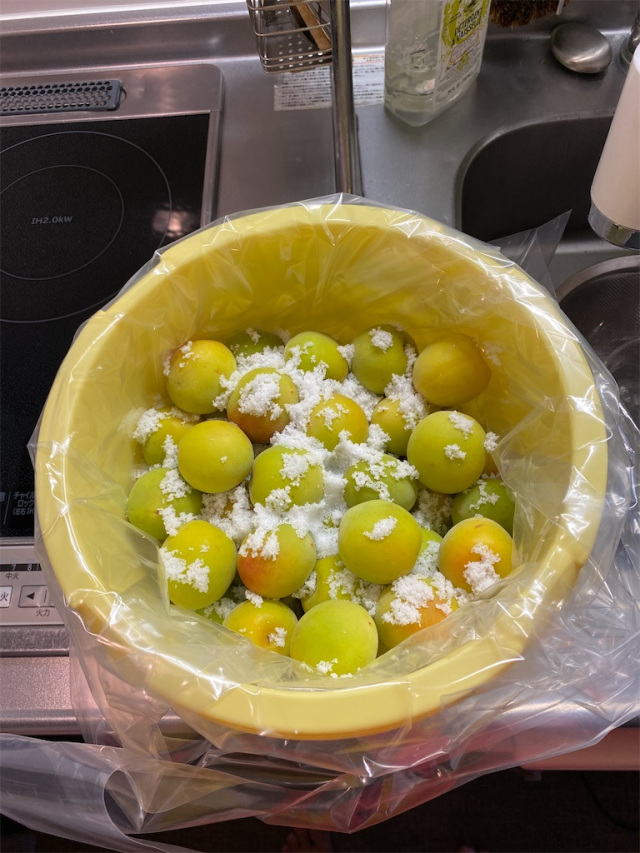
Step 8: Cover with the small inner lid, then place the weight on top.
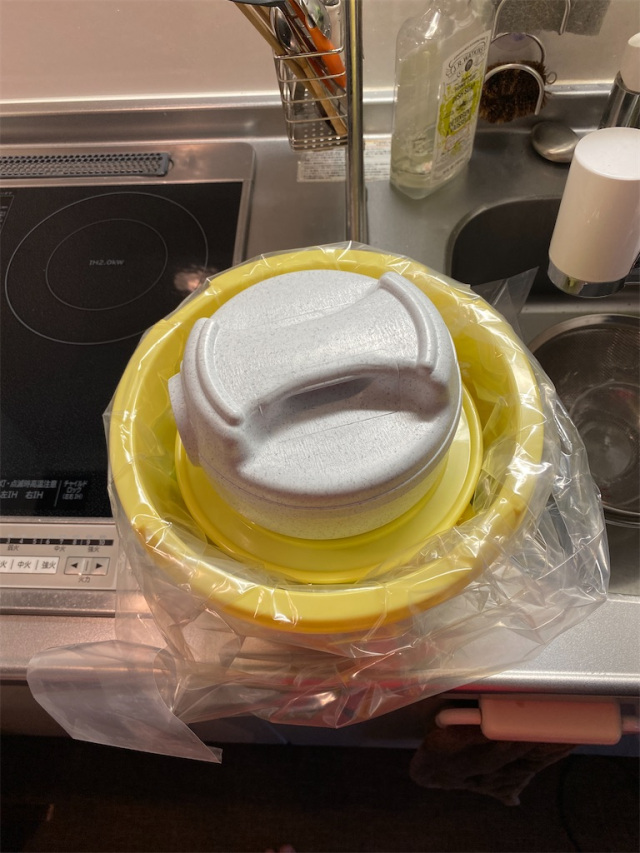
Step 9: Lightly tie the top of the bag to protect it against dust and insects.
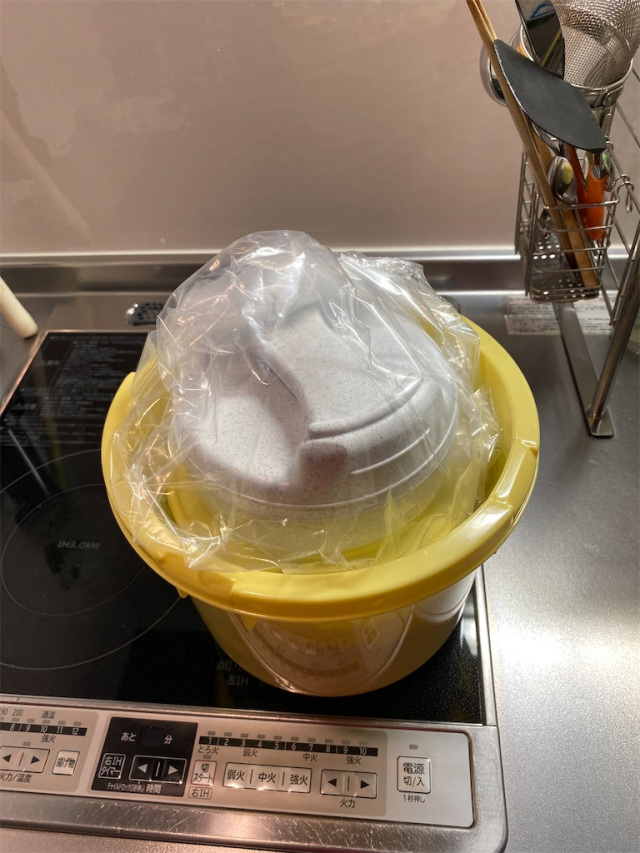
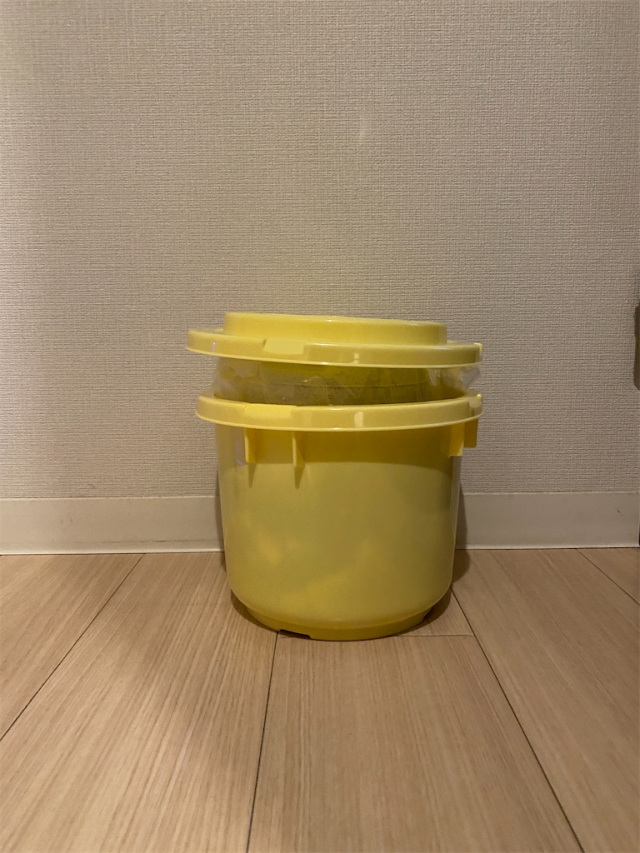
Step 10: Put the lid of the container on top, even if it doesn’t seal properly, and leave it in a dark, cool spot to do its magic for around a week.
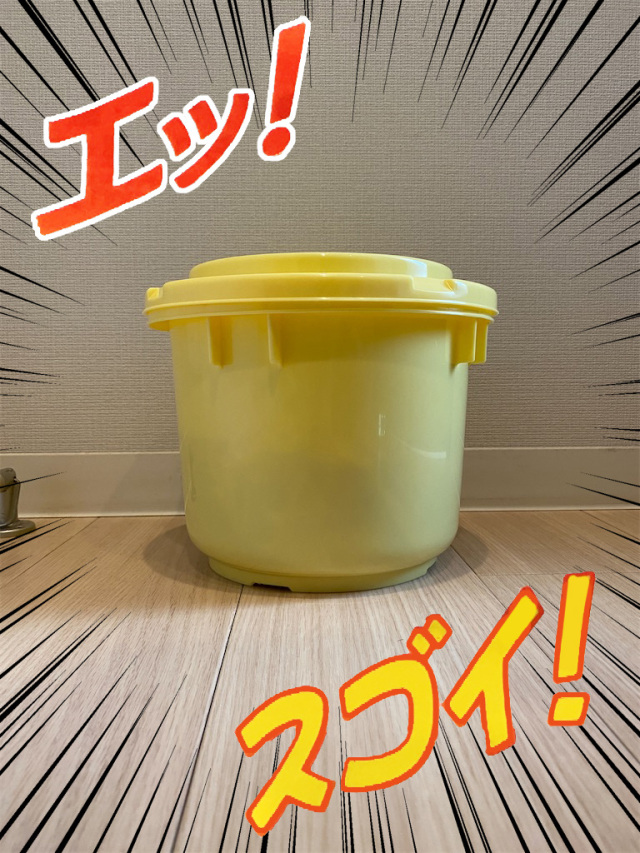
One week later…
Step 11: As if by magic, the lid can now be fully closed! This seemed so miraculous to Go that he illustrated his surprise with “エッ! スゴい!” (“Huh! Amazing!”) on the photo.
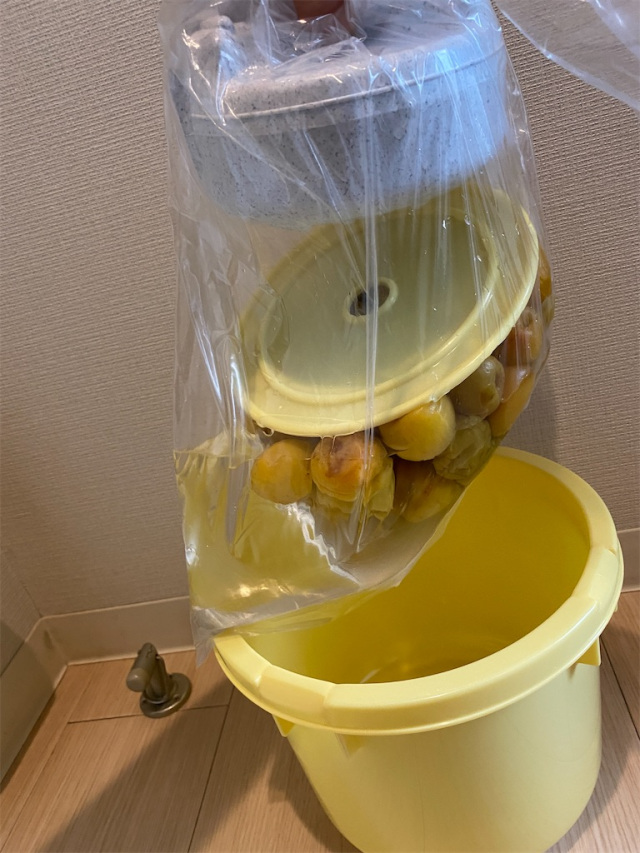
Step 12: Check that the plums look good and the liquid is relatively clear (this liquid is plum vinegar, created by the salt drawing the juice out from the plums). Leave everything as it is until mid-July.
Mid-July
Go proceeded to the next step, preparing the red perilla, on 17 July, although it may be possible to do this a week earlier. With everyone making their pickled plums at the same time, there’s a danger that the red perilla ingredient may be sold out by this time, which is why Go’s grandfather advises buying it as soon as it hits the market, even if it’s in the first week of July, to make sure you’re able to secure it before it sells out.
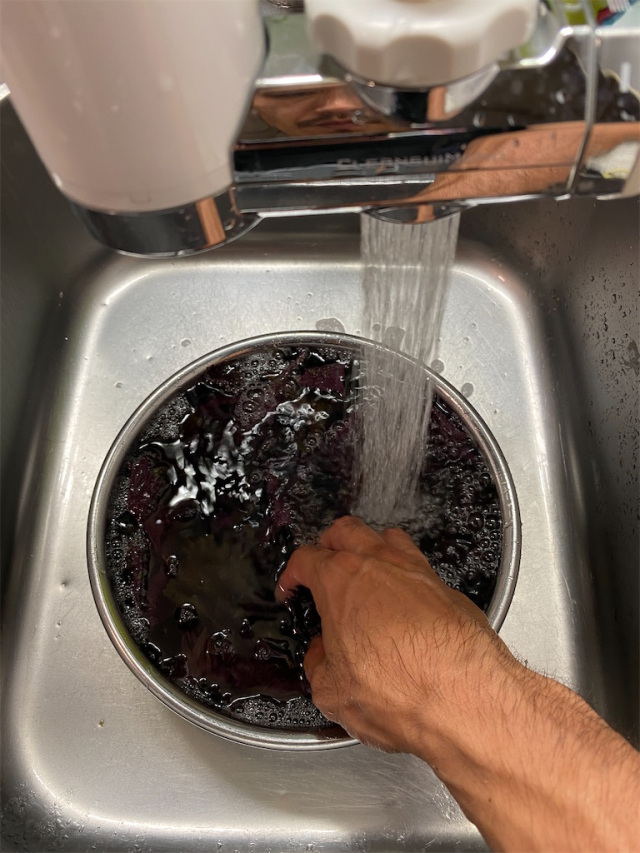
Step 13: Rinse the red perilla with water several times. Go was lucky here because he was able to use freshly picked perilla leaves that his grandfather had grown in his garden.
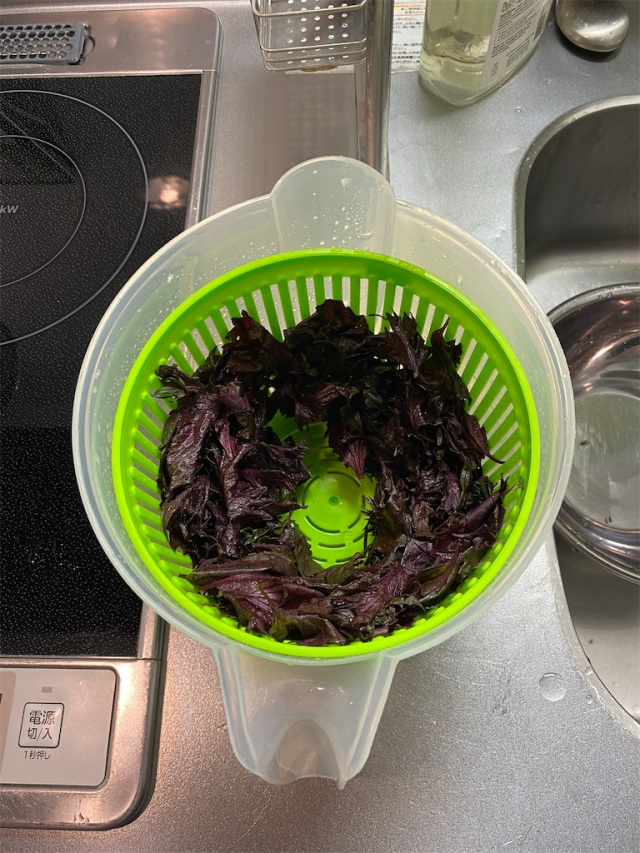
Step 14: Remove as much of the water as possible. Go used a salad spinner for this step.
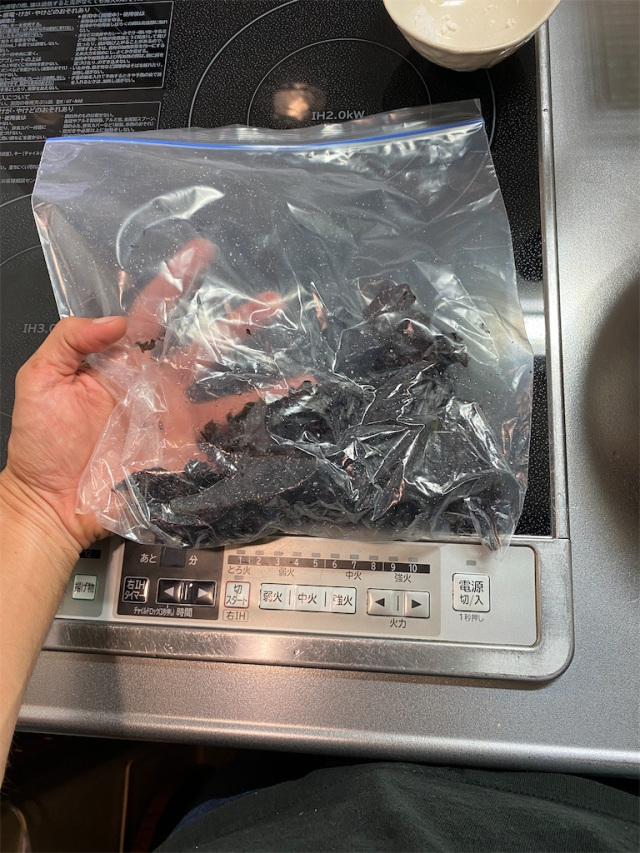
Step 15: Place the dried red perilla and coarse salt (10 percent of the weight of the red perilla) in a zip lock bag and shake it. Once the salt has been evenly distributed through the leaves, remove the air from the bag, seal it, and squeeze the contents, while still in the bag, with your hands.
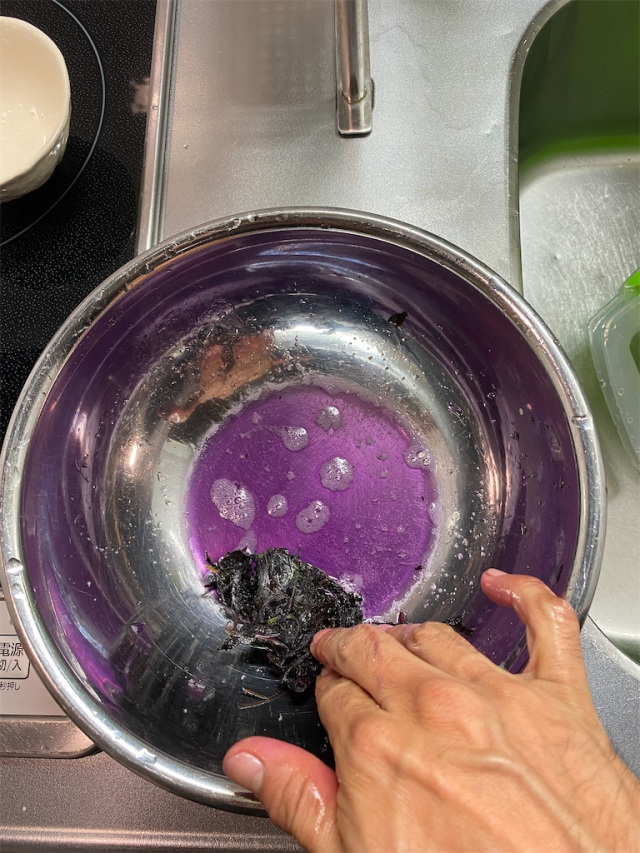
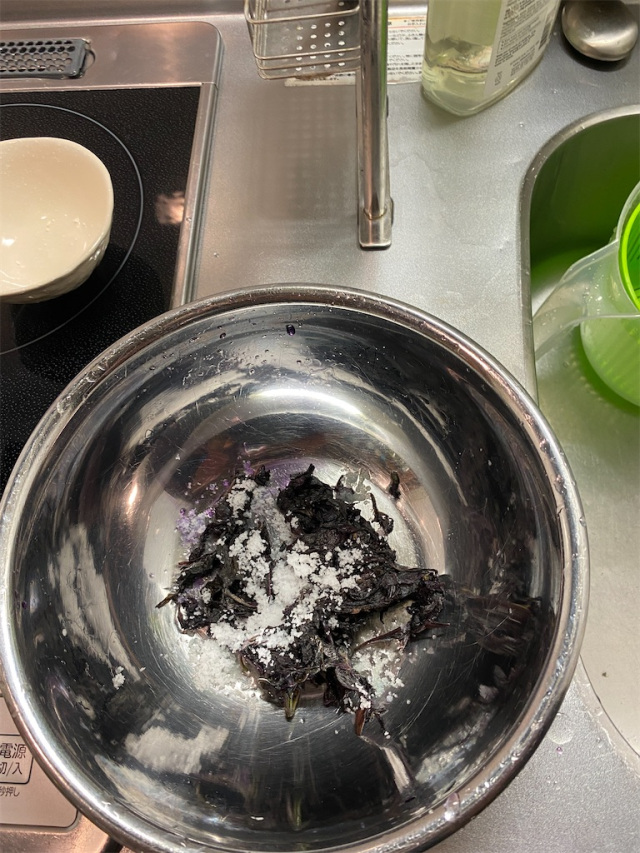
▼ Step 16: Take the leaves out of the bag, place them in a bowl and press them hard with your fingers. This will release a purple-coloured liquid, which needs to be discarded.
Step 17: Spread the perilla out without breaking it, add some salt to cover and squeeze again. The purple liquid will appear again, so discard the liquid and repeat 2-3 times until the liquid no longer appears.
Step 18: Scoop a spoonful of the plum vinegar out of the plum bag and place it over the squeezed red perilla. This will make it turn into a nice red colour!
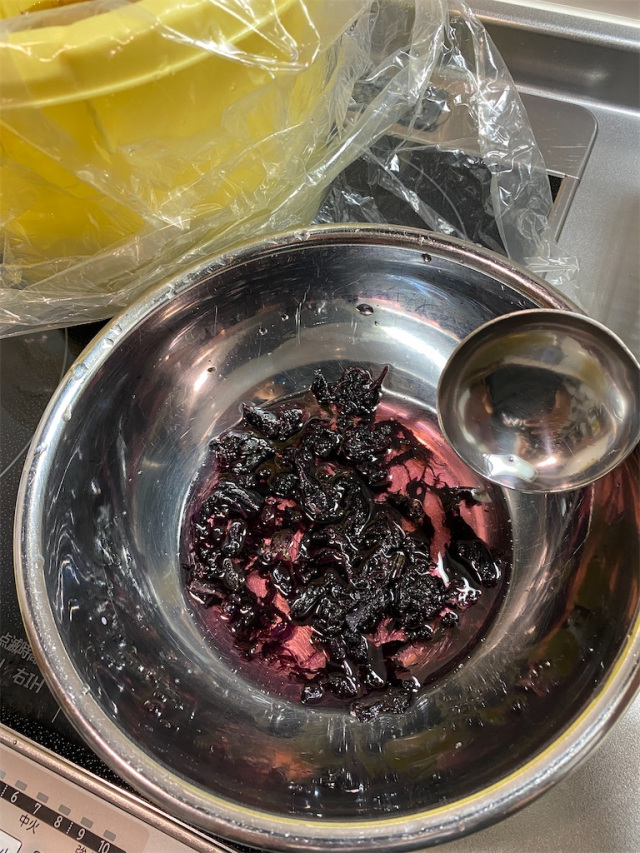
Step 19: Arrange the perilla evenly on the top of the plums and pour the red liquid from the bowl over everything.
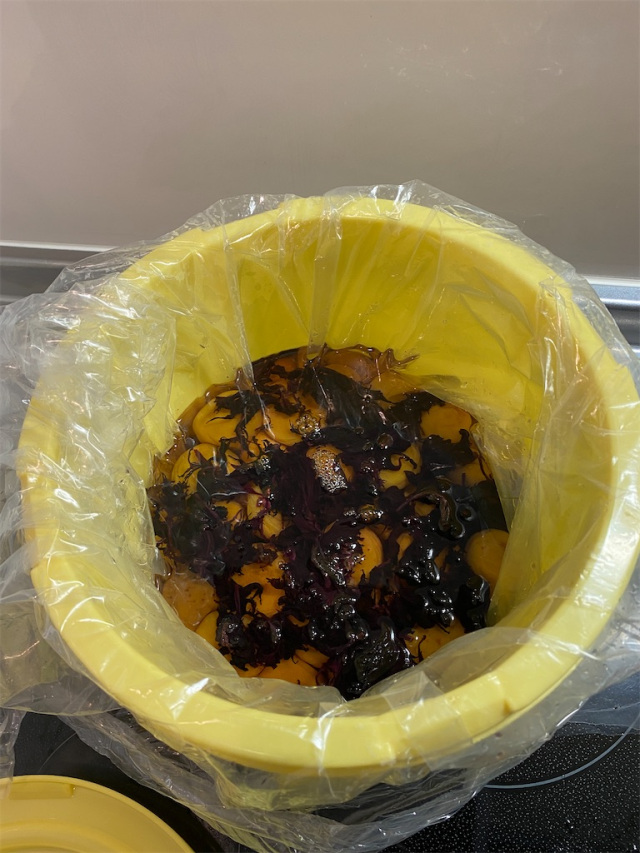
Step 20: Cover with the inner lid, place the weight on top, and lightly tie the bag.
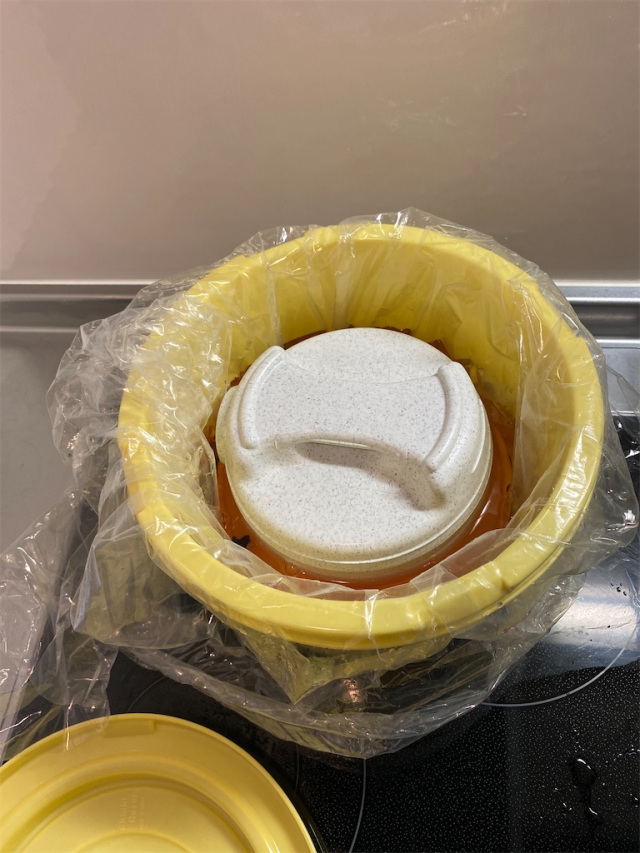
Step 21: Seal with the outer lid and leave it for about two weeks.
Early August
Go proceeded to the next step of drying the plums on 1 August, but his grandfather advises that it’s best to start this step on the Day of the Ox, which falls on different midsummer days depending on the year. This year, the Day of the Ox was on 28 July, but it’s still okay to start drying the plums a little after this date.
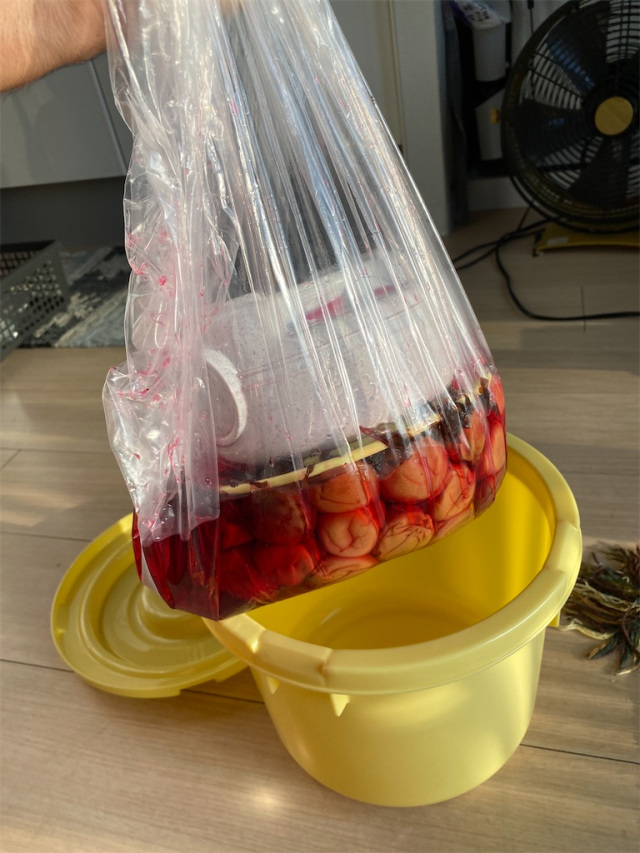
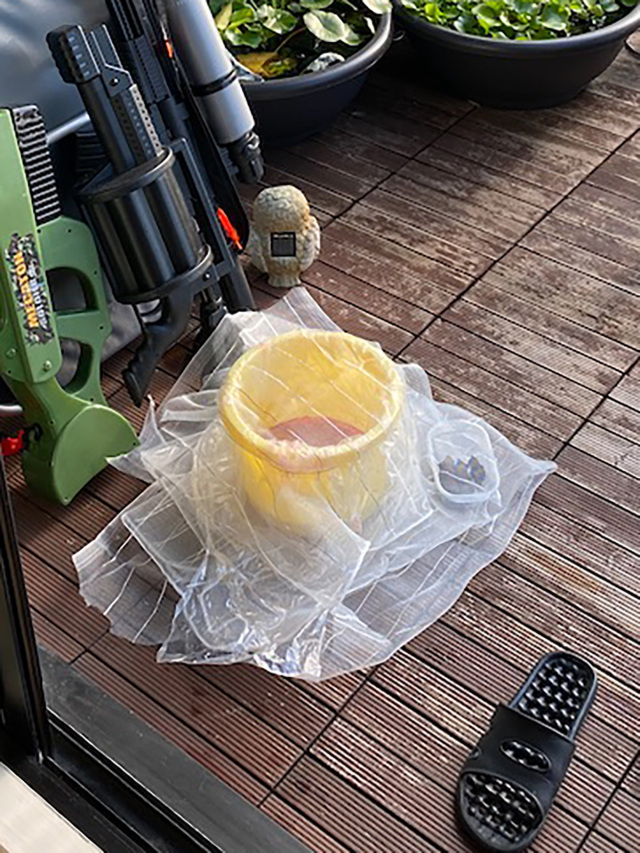
Step 22: Take the bag out of the container and admire the beautiful red hue of the mixture you’ve created!
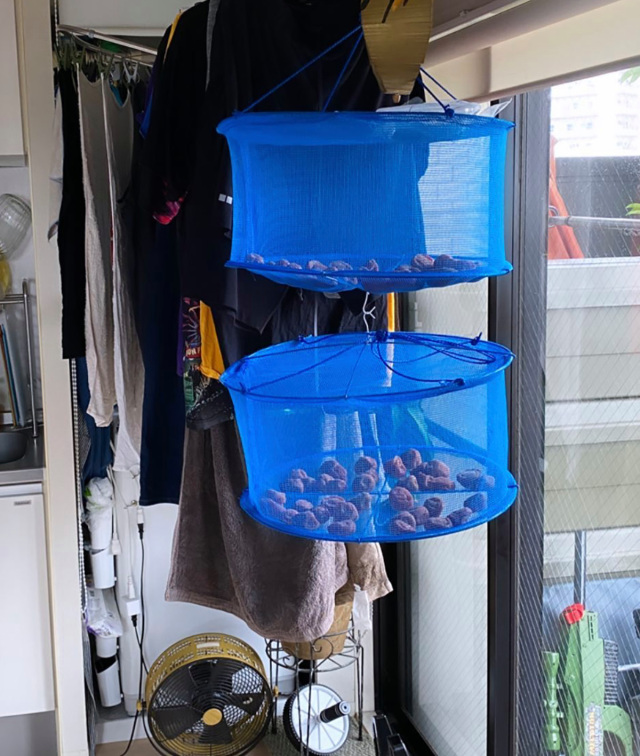
Step 23: Arrange the plums on a drying net like this one Go bought from Daiso.
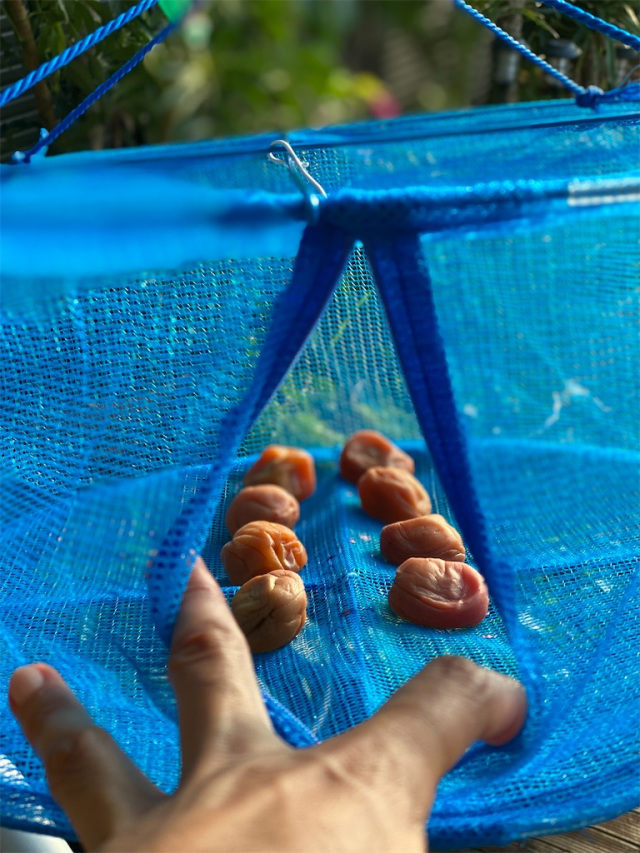
Step 24: Dry them! One kilo of plums was the perfect amount for one net, so Go spread his two kilos of plums across two nets.
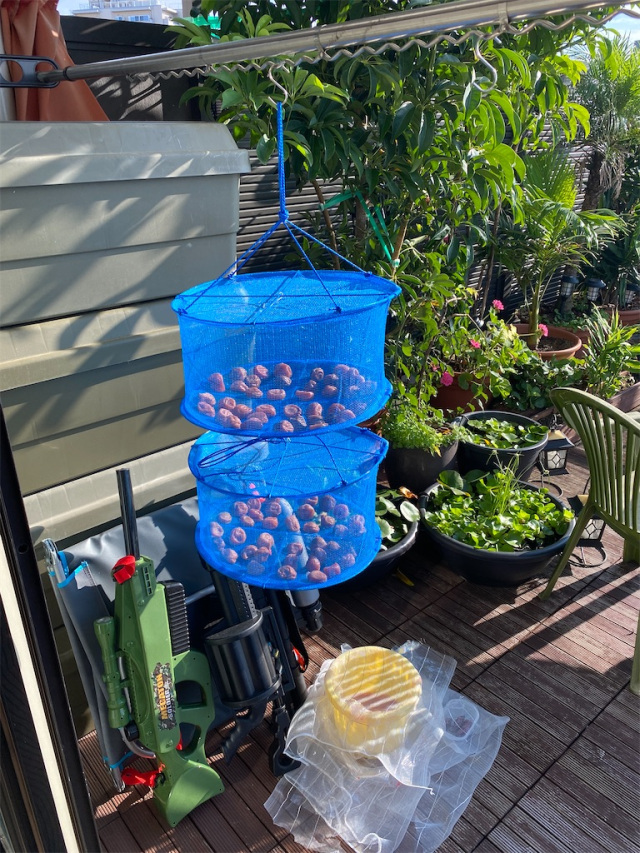
Step 25: Take the red perilla leaves out of the container, place in a separate plastic container and dry them in the sun. Place the plum vinegar in the pickling container and expose it to sunlight to sterilise it as well, with netting over the top of both containers to protect them from dust and insects. Turn the plums over once during the day and put them back in the plum vinegar in the evening and leave them overnight.
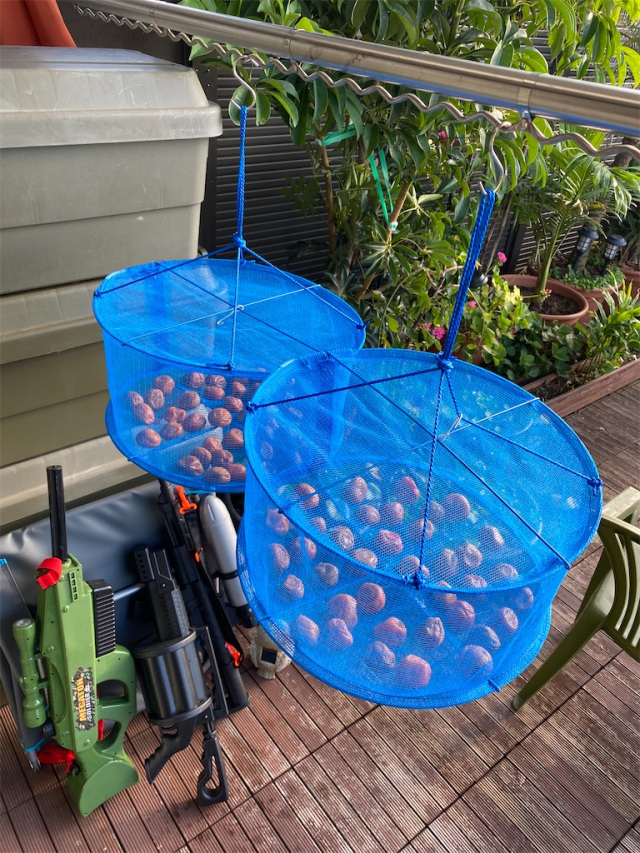
Step 26: This is the second day of drying the plums. Go dried them in the nets from the morning, when it was raining, so he brought them indoors and placed them by the window, taking them outside when the sun came out again. During the day, he turned the plums over once while they were in the nets and brought them indoors overnight.
Step 27: The third day of drying begins again from the morning, and the plums are turned over once during the day. This time, don’t take the plums inside at night — leave them outdoors in the nets overnight to expose them to the nighttime dew.
Step 28: The next morning, enjoy gazing at the fruits of your labour as they glisten in the morning sunrise.

Step 29: Collect the plums!
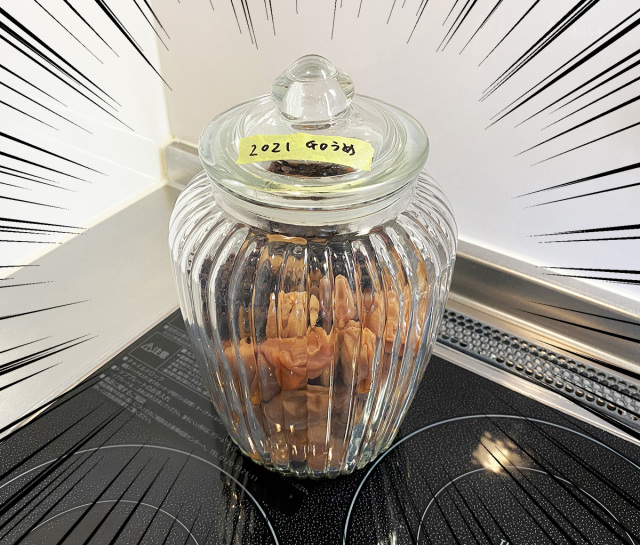
Step 30: Place the plums in a large container. Go bought this glass container for 200 yen at Daiso.
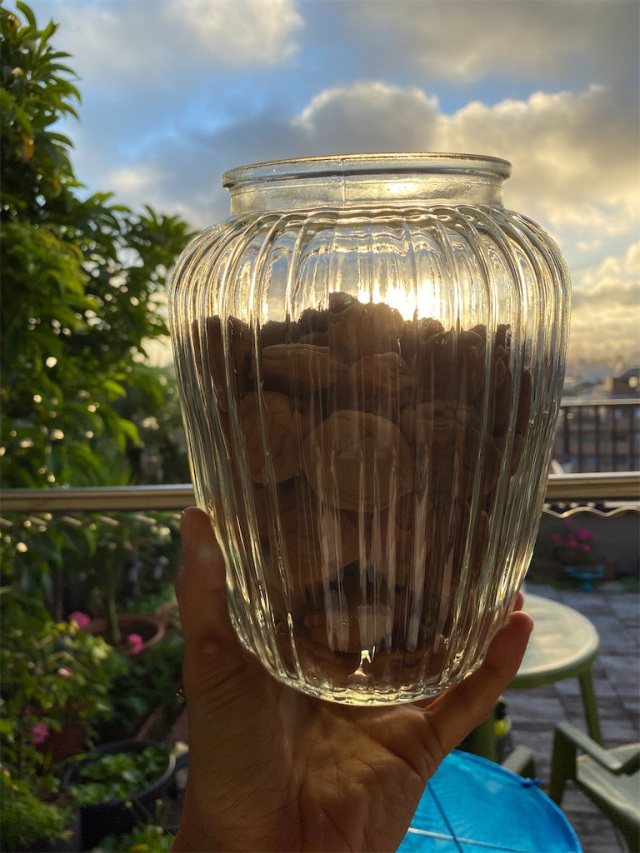
Step 31: Your umeboshi are now complete!
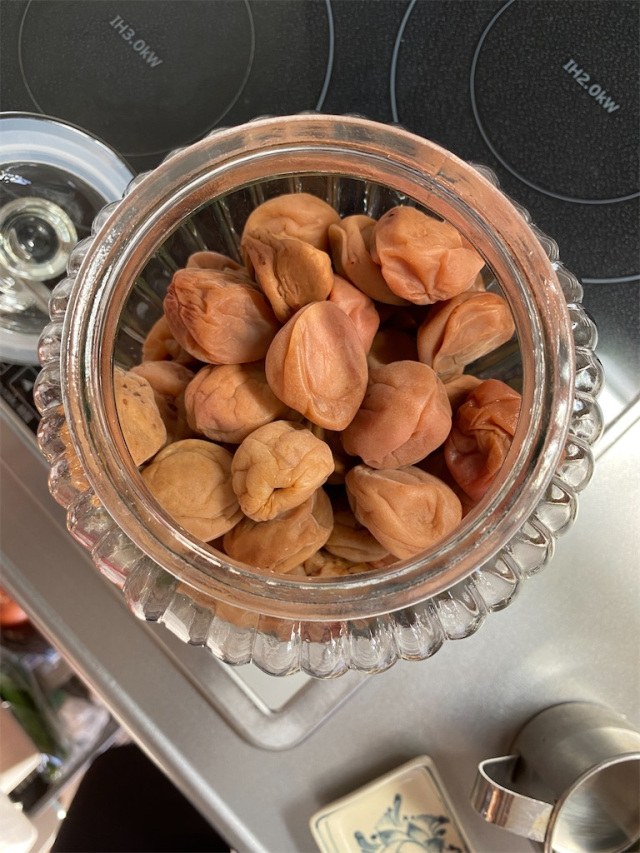
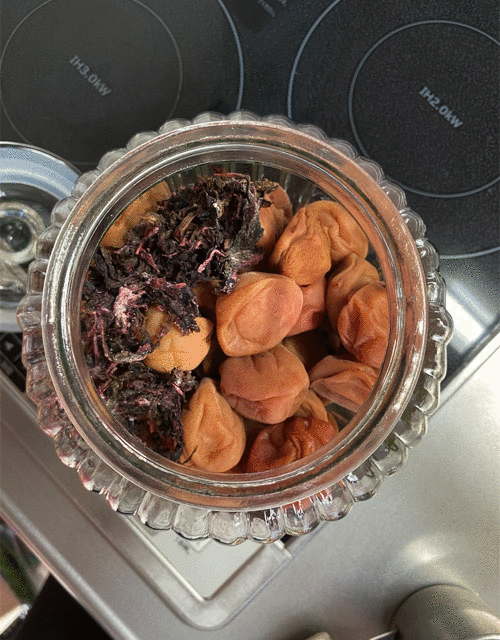
Step 32: Now you can place the red perilla leaves (which were stored in the fridge after being out in the sun on the first day of drying) in the jar with the umeboshi.
Step 33: Then you can write the year on a bit of tape and stick it to the jar — Go wrote “2021 Go うめ” (“2021 Go Plums”).
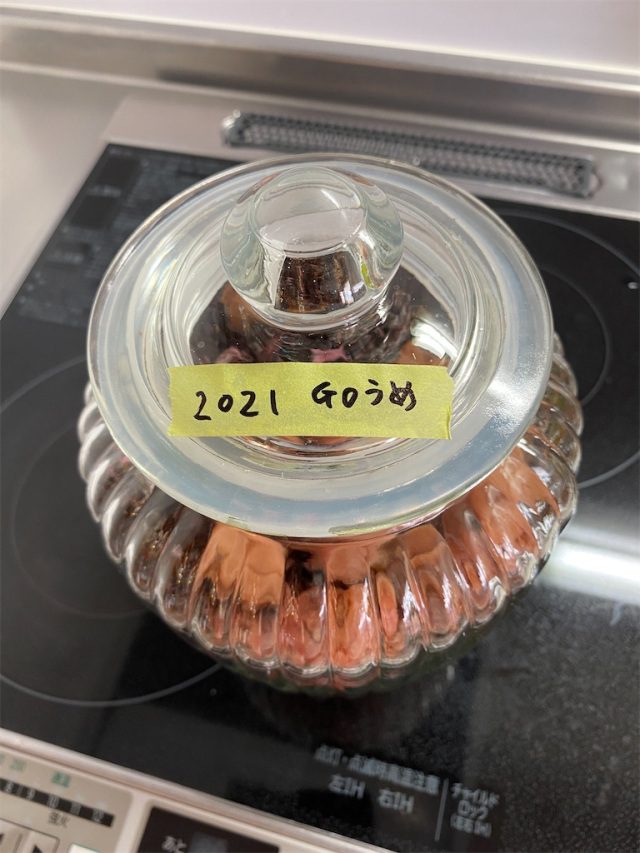
Step 34: Congratulations — the entire process is finally complete!
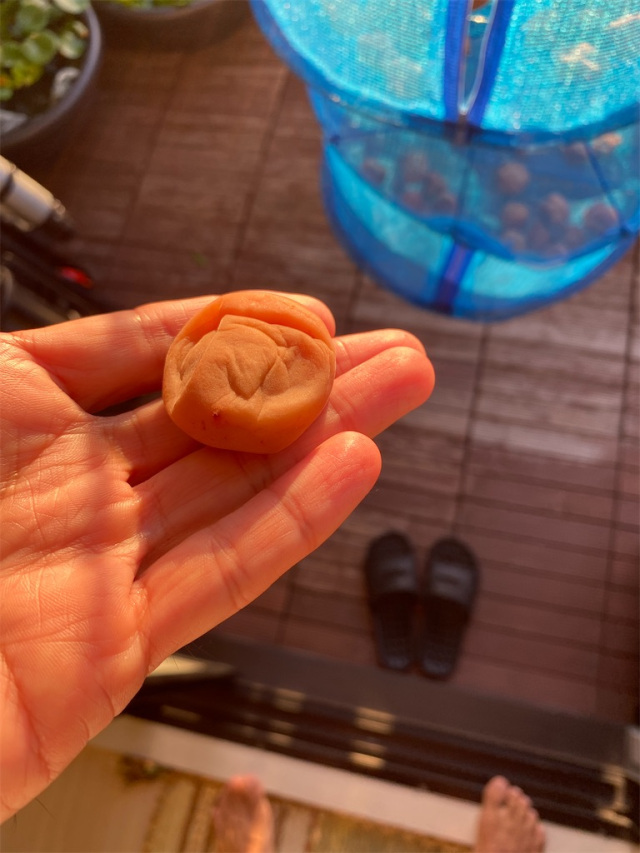
Of course, no recipe can be made without a proper tasting, so Go cooked up a batch of rice in his rice cooker and picked out one of the plums for tasting.
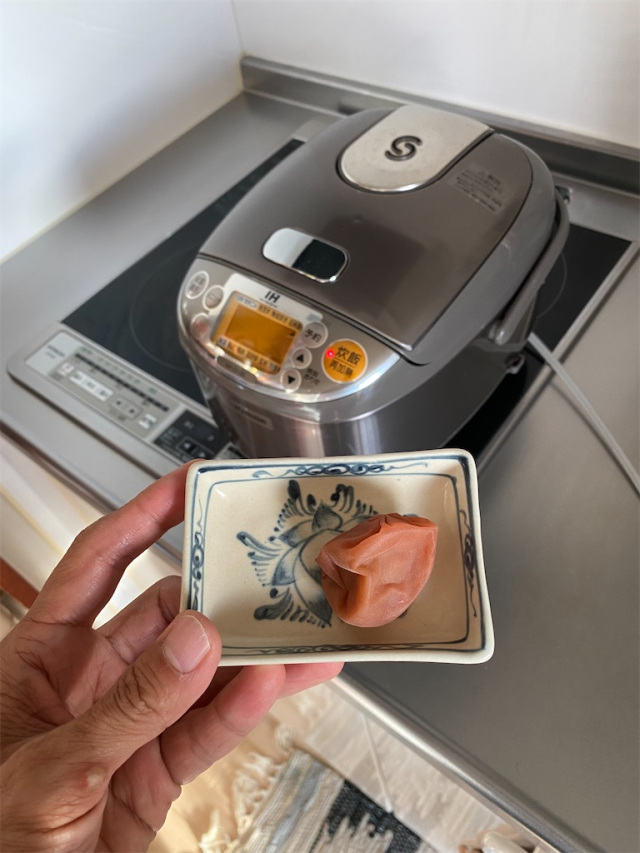
Go figured the best way to truly enjoy the flavour of his plum would be with an onigiri rice ball, so he expertly moulded one together in the palms of his hands, placing the pickled plum in the middle of it all, and finished it off with a thin layer of crispy seaweed.
▼ Go’s “umai!” (“delicious!”) reaction says it all.
The only criticism Go expressed in the clip above was the fact that the umeboshi was still “wakai” (“young”) compared to the ones he tried at his grandfather’s place, which were made last year.
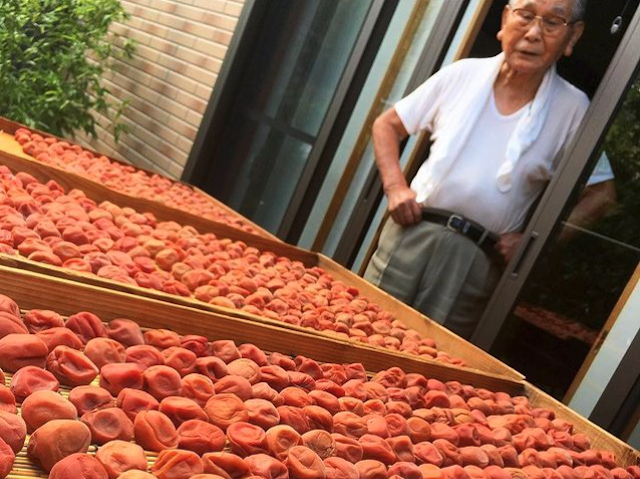
Pickles develop greater depth of flavour over time, so while Go’s pickles tasted immature immediately after making them this year, he can look forward to them becoming even more delicious in the coming months. And maybe one day he’ll be able to take on the mammoth scale of umeboshi making displayed by his grandfather every year.
▼ This photo shows the umeboshi made by Go’s grandfather in 2017.
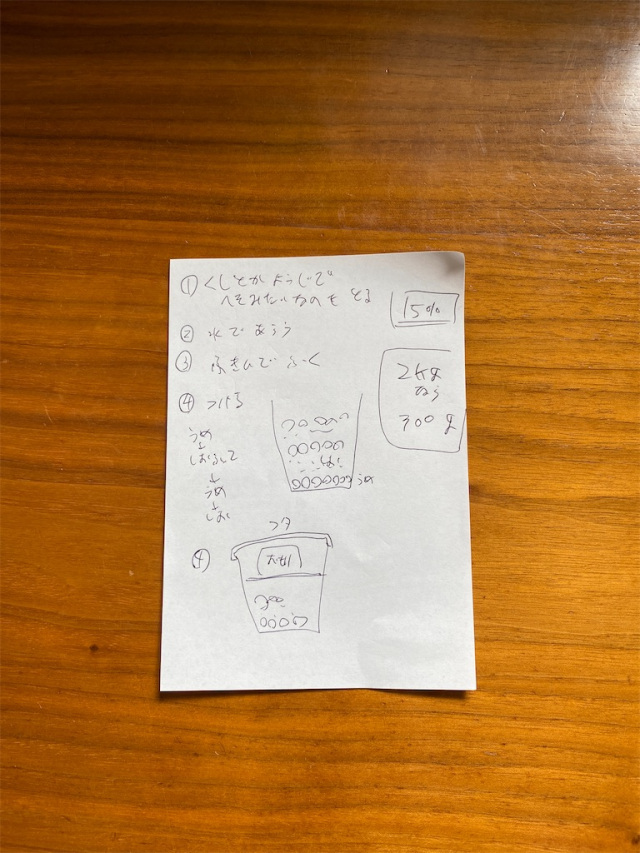
While the process for making umeboshi takes several months, the good news is there’s not a lot of really hard work that goes into making the pickled plums. When Go asked his grandfather for the recipe, he handed him a simple handwritten note, which shows the main steps of: 1. removing the hard bit from the plums 2. Washing the plums 3. Wiping the plums 4. Placing the plums and salt in layers in the container.
▼ This is the family recipe for umeboshi with 15-percent salt content (using two kilos of plums and 300 grams of salt).
You can even skip the perilla leaves if you’re unable to find them, although this will make for a lighter-coloured plum in the end, as the deep red hue comes largely from the perilla leaves. Regardless of whether you make them with or without perilla, though, the umeboshi will start developing some fantastic flavours about half a year after making them — if you can hold off for eating them that long!
So next time summer rolls around, why not try your hand at umeboshi making? They’ll likely be the best umeboshi you’ve ever tasted, and they go perfectly with rice balls, especially ones that look like cute cats!
Photos ©SoraNews24
● Want to hear about SoraNews24’s latest articles as soon as they’re published? Follow us on Facebook and Twitter!
[ Read in Japanese ]
 How to make pickled plums like the Japanese grandparents you may or may not have【Part 1】
 Japanese salted plum industry in dire straits, according to umeboshi company’s tweet
 Our authentic, homemade red pickled ginger triumphs over store-bought versions【SoraKitchen】
 Pizza Hut Japan creates Japanese plum pizza, calls it a “Japanese Margherita”【Photos】
 Spending for pickled umeboshi among young Japanese people is halved from 20 years ago
 Hatsune Miku collaborates with Hokusai’s art in new Vocaloid ukiyo-e illustration series [Pics]
 Is Japan’s tourism boom slowing down? Foreign visitor numbers fall for first time in five years
 Teen girl in Japan refuses to be victim, personally escorts train pervert to police for arrest
 Evangelion beautifully reimagined as iconic classical Japanese folding screen art series [Photos]
 Cup Noodle unveils first-ever cold-water instant ramen in Japan
 Studio Ghibli releases huge new wooden clip collection featuring 25 anime movies
 Starbucks Japan adds new Frappuccino, Tea, and Chillax Soda to its limited-edition summer menu
 Can instant TKG from Don Quijote really recreate Japan’s beloved raw-egg-on-rice dish?
 Tokyo and Osaka make it into this year’s EIU ranking of the world’s Top Ten Most Liveable Cities
 Tokyo Disneyland and Disney Sea raising ticket prices, free Fast Pass ending next month
 Studio Ghibli has a new anime out, and there’s only one place in the world where you can see it
 Family Mart opens new “Famima” flagship store in Tokyo that’s like a tourist attraction
 Uniqlo looks back to the very start of Pokémon with new black-and-white pixel art T-shirts[Pics]
 Japan reacts to Donald Trump’s “Islamic Republic of Japan” remark
 Japanese airport rebrands itself as “Sushi Airport” to attract foreign tourists
 Japanese government ID card and app to be required for certain Pokémon card purchases next month
 Three new starter Pokémon Jets to fly in Japan, first begins carrying passengers this month
 Studio Ghibli theme park’s new dessert is a drinkable version of Hayao Miyazaki’s pilot daydream
 Solid gold Hedorah kaiju from the Godzilla series is now available to pre-order
 Japan announces sudden 400-percent increase in visa fees for foreigners entering the country
 Japanese ninja certification exam attracts 131 candidates from Japan and abroad
 Salomon releases Japan-exclusive Mt. Fuji hiking gear that doubles as an amazing souvenir
 Studio Ghibli store Donguri Republic announces opening of first-ever store in America
 Japan triples departure tax, foreign tourists and locals now must pay more to leave country
 Japanese sweets shop sells an ohagi so exquisite it sells out by noon
 Sanrio Character Poll announces winners, Hello Kitty absent from top 10 in many countries
 Japan’s human washing machines will go on sale to general public, demos to be held in Tokyo
 Starbucks Japan releases new drinkware and goods for Valentine’s Day
 Starbucks Japan releases new sakura goods and drinkware for cherry blossom season 2026
 Japan’s newest Shinkansen has no seats…or passengers [Video]
 Put sesame oil in your coffee? Japanese maker says it’s the best way to start your day【Taste test】
 Japan reportedly adding Japanese language skill requirement to most common foreigner work visa
 Craving cheese but on a diet? Try our “advanced tofu pickles!” 【Recipe】
 Easy yet tasty instant miso soup ball recipe will help you clear out your kitchen【SoraKitchen】
 How to make no-rice “fried rice”【SoraKitchen】
 Make your best-tasting onigiri taste even better with this easy recipe! 【RocketKitchen】
 How to make cheese with just three ingredients【SoraKitchen】
 Do gohan no otomo, Japan’s traditional easy white rice toppings, work with toast?【SoraKitchen】
 How to make a “curry rice bowl” using instant oatmeal instead of rice 【SoraKitchen】
 How to cook rice in a Ziploc container【SoraKitchen】
 How to cook shiitake mushrooms like a Japanese manga character
 How to make a shaved ice dessert out of instant noodles
 Got a hankering for hanpen? Here’s how to make your own Japanese fish cakes【SoraKitchen】
 How to make your own Pringles-flavor instant noodles【SoraKitchen】
 Easy peasy lemon squeezy: Our writer attempts to make salted lemon
 Tokyo store serves stunning kakigori ice dessert that looks and tastes like an onigiri rice ball
 10 Japanese foods you can make at home!